Author: admin

  • Gluten Free Coffee Cake Breakfast That Fooled My Non-Celiac Family

    Gluten Free Coffee Cake Breakfast That Fooled My Non-Celiac Family

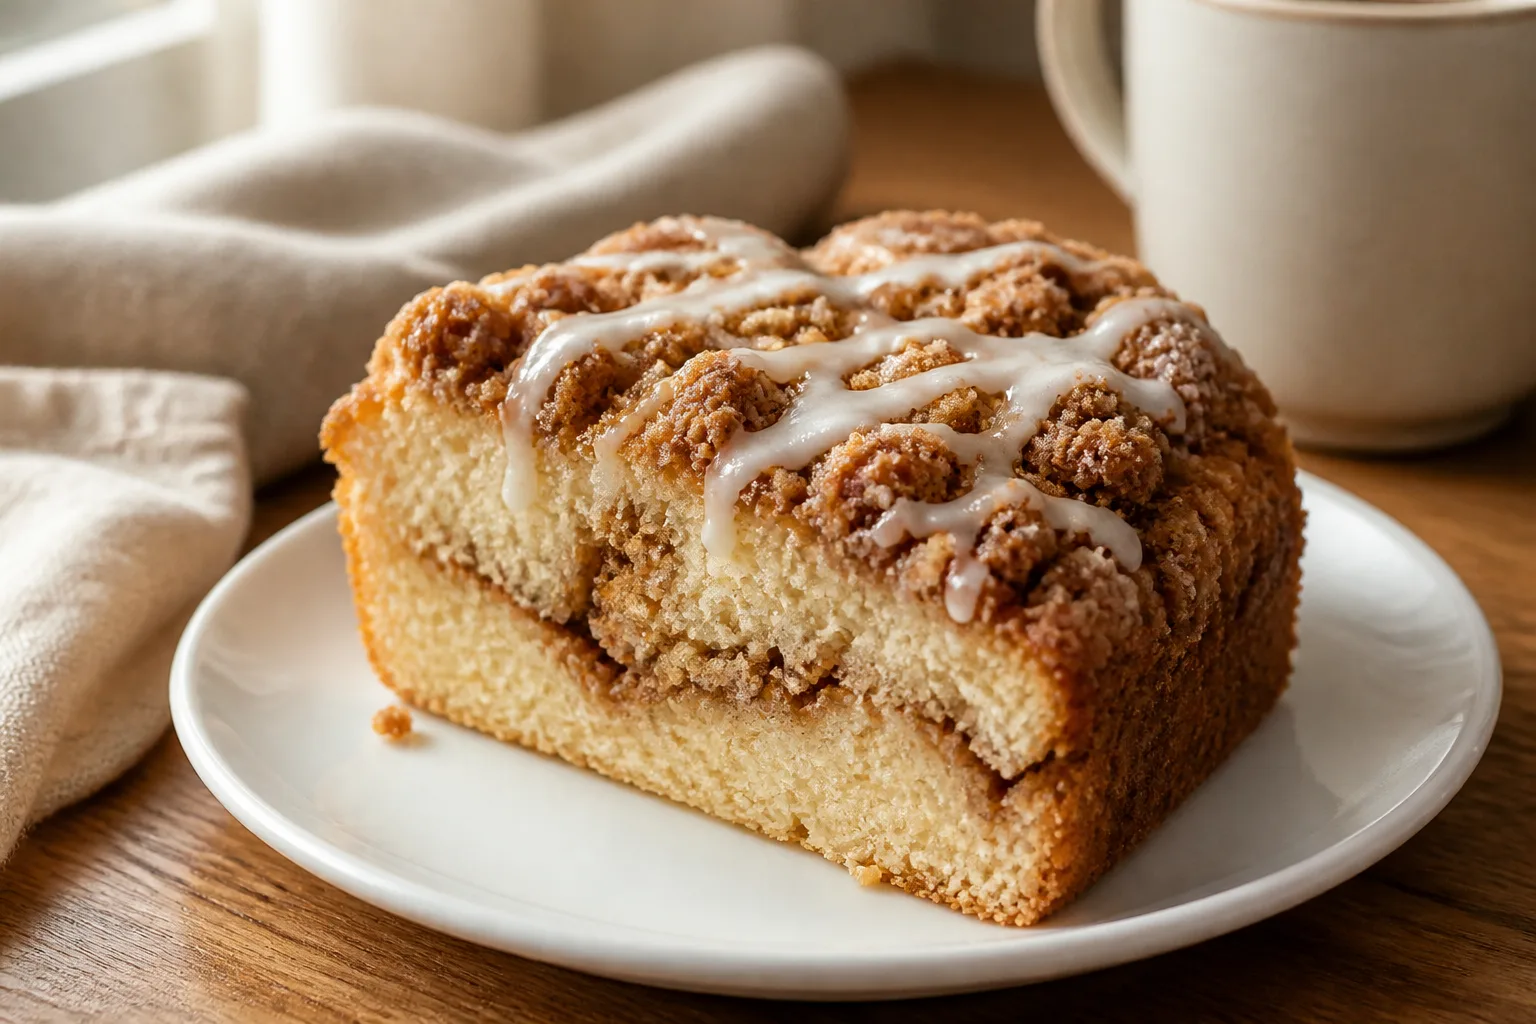
    Here’s the gluten free breakfast that completely fooled my non-celiac family: a tender, cinnamon-swirled coffee cake with a buttery crumbly top. It slices clean, stays moist, and pairs perfectly with a hot mug of coffee.

    I wanted a weekend bake I could put on the counter and watch disappear. This one does it. The batter mixes up in one bowl, the streusel takes a minute, and the vanilla glaze is optional but irresistible.

    Why this gluten free coffee cake really works

    This cake uses a 1:1 gluten free baking flour with xanthan gum plus a little cornstarch to mimic cake flour, which keeps the crumb soft instead of sandy. Sour cream brings moisture and richness so it stays tender even the next day.

    The batter is intentionally thick so it can hold a ribbon of cinnamon sugar in the middle without sinking. A quick, buttery streusel on top adds crunch and that classic coffee cake vibe. If cross-contact is on your mind, read these straight-talk tips in Gluten Free Breakfast for Celiac Beginners and the practical checklist in The Cross-Contamination Mistakes That Ruin a Gluten Free Breakfast.

    What you’ll need

    Simple pantry staples do the heavy lifting here. The combo of gluten free flour, cornstarch, and sour cream is the secret to a soft crumb and bakery-style texture.

    Streusel and Cinnamon Swirl

    • 1/2 cup light brown sugar, packed
    • 2 tsp ground cinnamon
    • 1/8 tsp fine salt
    • 1/2 cup gluten free 1:1 baking flour
    • 3 tbsp unsalted butter, melted and slightly cooled

    Cake Batter

    • 1 3/4 cups gluten free 1:1 baking flour, with xanthan gum
    • 1/4 cup cornstarch
    • 1 tsp baking powder
    • 1/2 tsp baking soda
    • 1/2 tsp fine salt
    • 1/2 cup unsalted butter, softened
    • 3/4 cup granulated sugar
    • 2 large eggs, room temperature
    • 1 cup sour cream, room temperature
    • 2 tsp vanilla extract

    Optional Glaze

    • 1/2 cup powdered sugar
    • 1-2 tbsp milk, as needed for drizzling
    • 1/4 tsp vanilla extract

    How to make it

    Follow these steps and use the visual cues so the cake bakes up fluffy with a crisp, cinnamon-studded top.

    1. Preheat the oven to 350°F (175°C). Line an 8-inch square metal pan with parchment so it overhangs two sides for easy lifting, and lightly grease the other sides.
    2. Make the streusel: In a medium bowl, stir together brown sugar, cinnamon, salt and gluten free flour. Pour in the melted butter and mix with a fork until it forms moist clumps. Set aside.
    3. Whisk the dry ingredients: In a separate bowl, whisk the gluten free flour, cornstarch, baking powder, baking soda and salt until well blended.
    4. Cream the butter and sugar: In a large mixing bowl, beat the softened butter and granulated sugar with a hand mixer on medium speed until light and fluffy, 2 to 3 minutes. Beat in the eggs one at a time, scraping the bowl, then mix in the sour cream and vanilla until smooth.
    5. Add the dry ingredients: Add the flour mixture to the wet ingredients and mix on low just until the dry streaks disappear. The batter will be thick and creamy.
    6. Layer the cake: Spread half the batter into the prepared pan in an even layer. Sprinkle on half of the streusel. Dollop the remaining batter over top and gently spread to cover, then finish with the remaining streusel.
    7. Bake for 32 to 38 minutes, until the top is golden and a toothpick inserted near the center comes out with a few moist crumbs. If using a glass pan, add 2 to 5 minutes as needed.
    8. Cool in the pan on a rack for 15 minutes. Lift out using the parchment and cool at least 20 minutes more before slicing so the crumb sets.
    9. Optional glaze: Whisk the powdered sugar, vanilla and just enough milk to make a thick drizzle. Spoon over the cooled or slightly warm cake and let it set for 5 minutes before serving.
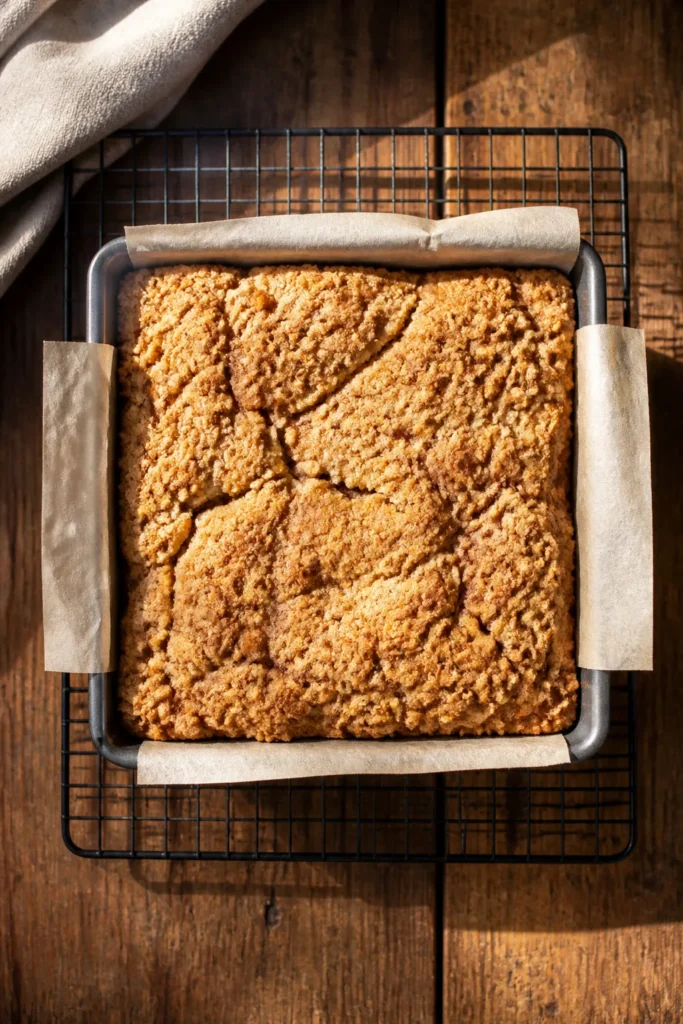
    Overhead of whole gluten free coffee cake in pan

    Storage, make-ahead and reheating

    Let the cake cool completely, then cover and keep at room temperature for 2 days or refrigerate up to 5 days. The crumb stays moist thanks to sour cream, but the streusel will soften over time.

    To freeze, wrap individual squares tightly and freeze up to 2 months. Thaw overnight in the fridge or on the counter for 1 hour. Reheat slices in a 300°F (150°C) oven for 8 to 10 minutes to refresh the crumb and perk up the topping. For more freezer-friendly morning ideas, see gluten free breakfasts that freeze well.

    Common mistakes to avoid

    • Swapping the flour without xanthan gum. Use a 1:1 gluten free blend that already includes xanthan. Without it, the cake will crumble.
    • Overmixing the batter. Mix until the dry streaks just disappear. Overmixing toughens the crumb and reduces lift.
    • Using cold dairy and eggs. Room-temperature sour cream and eggs blend smoothly and trap air for better rise.
    • Underbaking the center. Check in multiple spots. A tester should come out with a few moist crumbs, not wet batter.
    • Skipping the salt. A small pinch in both batter and streusel balances sweetness and brightens the cinnamon.
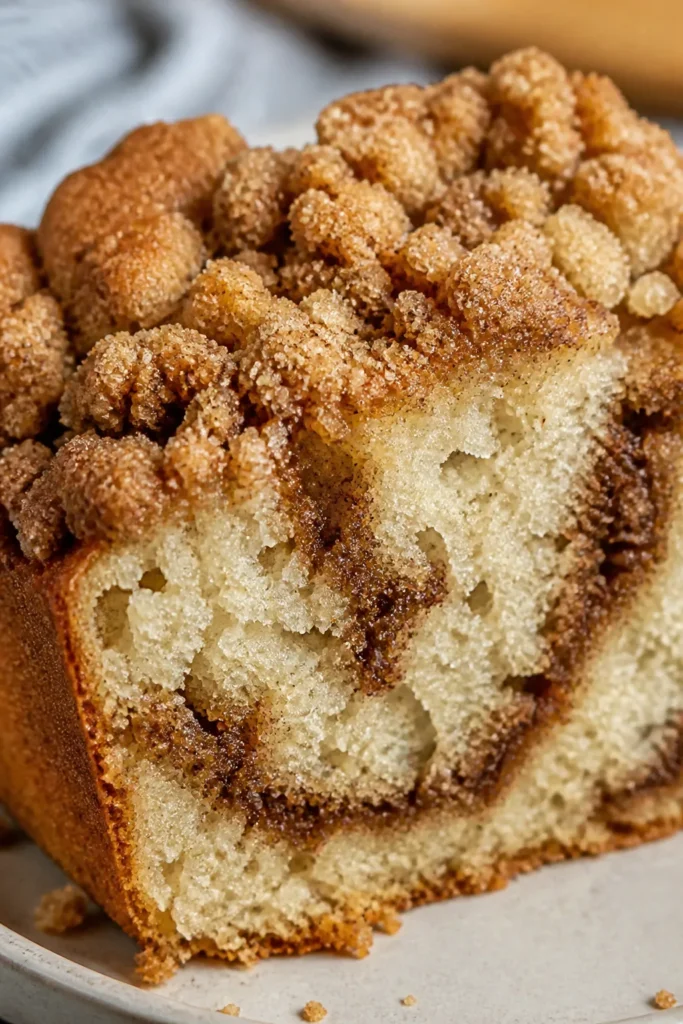
    Close-up of tender crumb and cinnamon swirl

    Variations and substitutions

    • Nut-free streusel. The base recipe is nut-free. If you want nuts, fold 1/3 cup chopped pecans into the streusel. If avoiding nuts, simply skip them.
    • Dairy-free option. Use vegan butter sticks for butter and a thick dairy-free sour cream or coconut yogurt for sour cream. Add 1 tablespoon neutral oil if the batter seems too stiff.
    • Coffee shop lemon version. Swap the cinnamon swirl for zest of 1 lemon plus 2 tablespoons sugar, and add 1 tablespoon lemon juice to the glaze.
    • Blueberry ripple. Gently fold 1 cup fresh blueberries into the batter and keep the cinnamon swirl. Dust berries with 1 teaspoon gluten free flour first to help suspend them.
    • Bundt or loaf. Bake in a 9×5-inch loaf pan for 55 to 65 minutes, or a small 6-cup Bundt for 40 to 45 minutes. Watch for the same doneness cues.

    What to serve with it

    A hot mug of coffee or tea is the classic move. For protein, add a scoop of Greek yogurt or a side of scrambled eggs. If you love a sweet-savory plate, pair a square with crispy bacon or breakfast sausage.

    On busy weekdays, I balance a slice with something quick and fresh like berries or a small smoothie. If you want more grab-and-go ideas, peek at these gluten free breakfasts on the go or my super reliable 5-minute gluten free yogurt bowl.
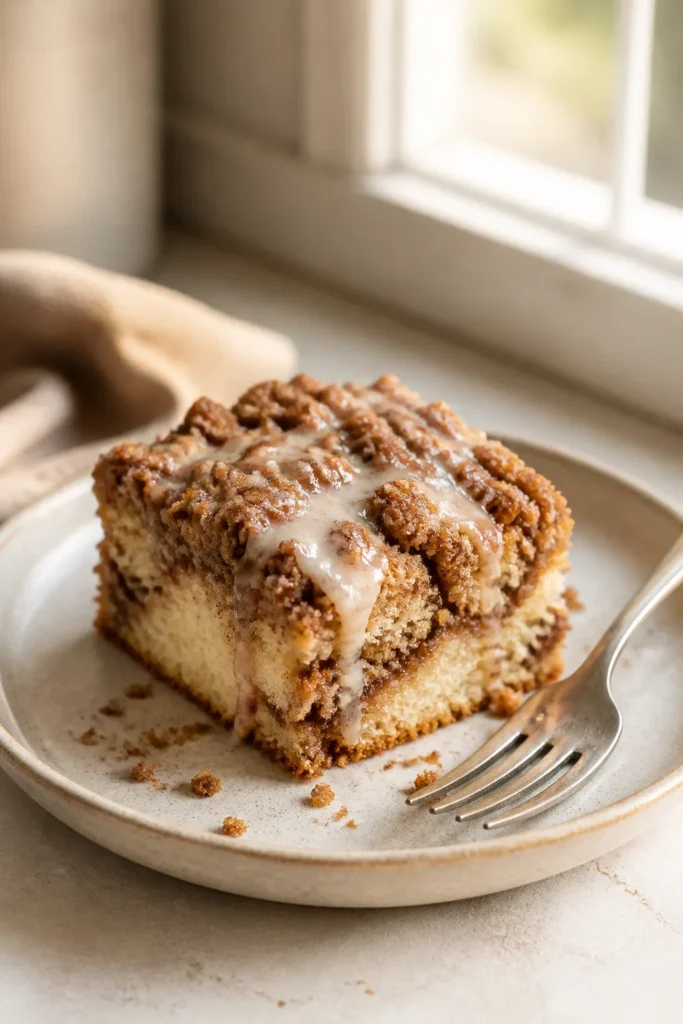
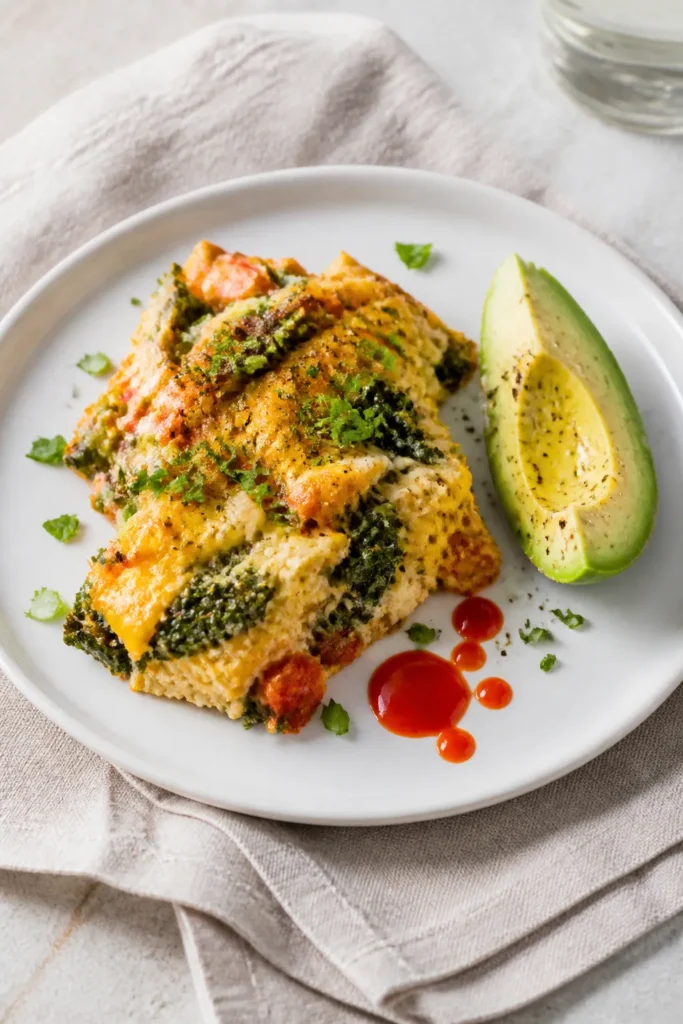
    Single serving of gluten free coffee cake on a plate

    Gluten free coffee cake FAQs

    Can I bake this gluten free coffee cake the night before?

    Yes. Bake, cool completely, then cover loosely and keep at room temperature overnight. The streusel stays crisper if you wait to glaze until morning. If it feels soft the next day, warm slices at 300°F (150°C) for 8 to 10 minutes.

    What gluten free flour works best for this recipe?

    Use a 1:1 gluten free all-purpose blend that already includes xanthan gum. Brands vary, but the ones designed to replace wheat flour cup-for-cup give the best texture here. If your blend has no xanthan, add 1/2 teaspoon xanthan gum to the batter.

    Can I make it less sweet?

    Reduce the granulated sugar in the batter to 1/2 cup and the brown sugar in the streusel to 1/3 cup. The cake will still brown and set properly. You can also skip the glaze or thin it more to drizzle lightly.

    How do I avoid cross-contact if I’m baking for someone with celiac disease?

    Use clean bowls and utensils, line your pan with parchment, and double-check labels on flour, spices, and baking powder. Store gluten free ingredients on a separate shelf. For more practical tips, see the guide on cross-contamination mistakes to avoid.

    Can I bake this in a round pan for a nicer presentation?

    Yes. Use a 9-inch round cake pan with 2-inch sides. Bake at the same temperature for 32 to 38 minutes, and start checking early. Let it cool 15 minutes before releasing from the pan.

    A short and warm send-off

    I knew this one was a keeper when my family asked for seconds before I could even mention it was gluten free. I hope it brings the same cozy, cinnamon-sugar happiness to your table.

    If you bake it, tell me how it went and what you served with it. Happy breakfasting.
  • 8 Gluten Free Breakfast Ideas for People Who Skip Breakfast

    8 Gluten Free Breakfast Ideas for People Who Skip Breakfast

    If mornings fly by and you keep skipping breakfast, this is for you. These are no-fuss, truly quick gluten free ideas that fit into the ten minutes you don’t have.

    Below you’ll find eight simple options and one make-ahead recipe that takes five minutes to prep. You’ll get steady energy, no mystery ingredients, and zero crumbs in the car.

    Why these gluten free breakfasts work for busy mornings

    People tend to skip breakfast because it feels complicated. These ideas solve that with foods you can prep in minutes, grab cold, or heat in under 60 seconds. The key is portable, high-protein, low-mess options that taste good and actually keep you full.

    Here are eight ideas that hit those marks: 1) make-ahead yogurt parfait jars (recipe below), 2) freezer-friendly egg cups, 3) peanut butter rice cakes with banana, 4) cottage cheese and fruit cups, 5) chia pudding with certified gluten free oats, 6) turkey and cheese roll-ups with an apple, 7) smoothie packs you blitz with milk, 8) a quick avocado tuna cup with crackers. If you want more egg-free options later, bookmark gluten free breakfast ideas without eggs, and if you prefer to prep once and be done, see make-ahead gluten free breakfasts you prep on Sunday.

    For mornings when a hot plate just won’t happen, the parfait jars are my go-to. They pack protein, fiber, and healthy fats, and they don’t get soggy. You can also freeze a few of the other ideas; I shared a full list here: gluten free breakfasts that freeze well. And if you’re looking for something you can sip, try these quick gluten free breakfast smoothies.

    Ingredients for Make-Ahead Gluten Free Yogurt Parfait Jars

    Simple pantry staples you can layer in minutes. Use certified gluten free oats and check labels on granola to avoid cross-contamination.

    • 2 cups plain Greek yogurt, or dairy-free yogurt
    • 1/2 cup certified gluten free rolled oats
    • 2 tbsp chia seeds
    • 2 tbsp pure maple syrup, or honey
    • 1 tsp vanilla extract
    • 1/8 tsp fine sea salt
    • 2 cups mixed berries, patted dry
    • 1/2 cup gluten free granola, for topping; add at serving
    • 4 tbsp nut or seed butter, optional, 1 tbsp per jar
    • 1 tbsp lemon juice, optional, brightens fruit

    How to make the parfait jars

    Layer, chill, and grab.

    1. In a medium bowl, whisk the yogurt, maple syrup, vanilla, and salt until smooth. Stir in the certified gluten free oats and chia seeds until evenly combined.
    2. Taste the mixture and add a little more maple syrup if you prefer it sweeter.
    3. If using lemon juice, toss it with the berries to keep them bright and reduce bleeding.
    4. Divide half of the yogurt mixture among four 8-ounce jars. Add a layer of berries, then 1 tablespoon nut or seed butter to each jar if using.
    5. Top with the remaining yogurt mixture, then finish with more berries. Do not add the granola yet.
    6. Seal the jars and chill at least 2 hours, ideally 4 hours, so the oats and chia can soften.
    7. When ready to eat, open a jar and sprinkle 2 tablespoons gluten free granola on top. Eat cold, or warm the yogurt-oat layer for 20 to 30 seconds in the microwave before adding granola.
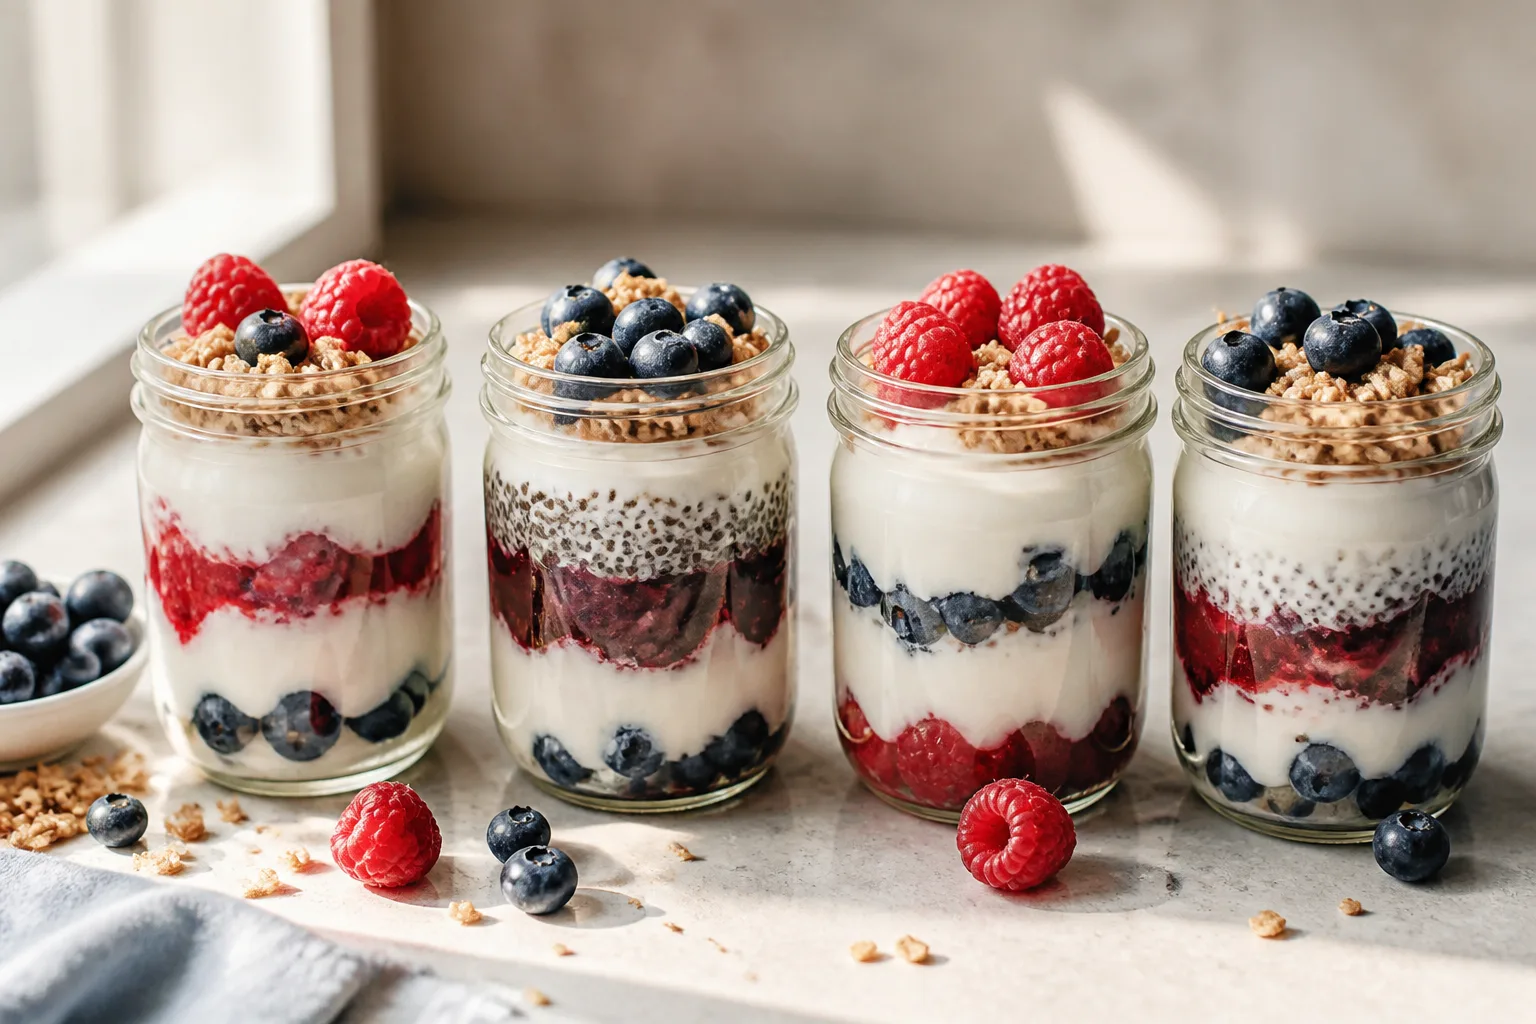
    Overhead view of four parfait jars and granola bowl

    Storage, make-ahead, and quick reheating (when needed)

    These parfait jars keep well for 3 to 4 days in the fridge. The oats and chia soften but keep a little texture, the fruit stays fresh, and the granola on top stays crisp if you add it right before eating.

    Make a full batch on Sunday night, or double it and keep the dry mix in a jar so you only measure yogurt and fruit during the week. If you prefer warm oats on extra-cold mornings, microwave just the oat-yogurt base for 20 to 30 seconds until barely warm, then add fruit and crunchy toppings.

    Common mistakes to avoid

    • Using regular oats instead of certified gluten free oats: Oats are often contaminated with wheat. Look for a certified gluten free label.
    • Adding granola too early: It gets soft in the jar. Pack granola separately and sprinkle on top right before eating.
    • Not enough protein: Low-protein breakfasts lead to mid-morning crashes. Use Greek yogurt or add a scoop of protein powder to the yogurt.
    • Juicy fruit at the bottom: Berries can bleed. Put fruit in the middle or on top to keep layers neat.
    • Skipping salt and acid: A tiny pinch of salt and a splash of lemon brighten flavors and balance sweetness.
    Close-up of parfait texture with oats and berries

    Variations and substitutions (8 quick combos)

    • PB & J Parfait: Peanut butter, strawberry jam, vanilla yogurt, and crushed peanuts. Use almond or sunflower butter if needed.
    • Tropical Crunch: Pineapple, mango, coconut flakes, and lime zest with plain yogurt and honey.
    • Mocha Chip: Stir 1 tsp instant espresso and mini chocolate chips into the yogurt, top with banana.
    • Apple Pie: Diced apple, cinnamon, maple syrup, and toasted pecans.
    • Berry Almond: Blueberries, sliced almonds, and a drizzle of almond butter with vanilla yogurt.
    • Peach Cobbler: Peaches, cinnamon, gluten free granola, and a touch of brown sugar yogurt.
    • Lemon Raspberry: Lemon zest and raspberries with chia seeds and a pinch of salt.
    • Protein Boost: Mix 1 scoop vanilla protein into the yogurt and top with any fruit, then add pumpkin seeds.

    What to serve with your grab-and-go jar

    Pair your jar with a small coffee, hot tea, or a bottle of water to start hydrating early. If you need extra staying power, add a hard-boiled egg, a cheese stick, or a piece of fruit on the side.

    On weekends, serve the jars with scrambled eggs or a slice of gluten free breakfast bread for a fuller plate. If your mornings start before sunrise, pack one jar and a banana the night before so you can eat as soon as you feel hungry.

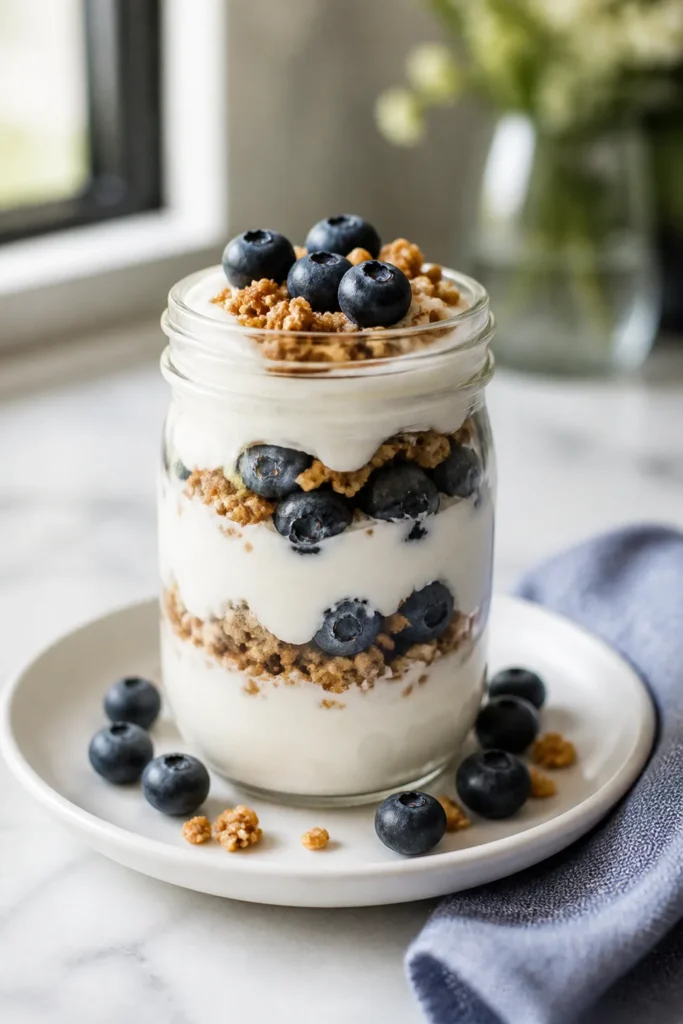
    Single parfait jar ready to eat

    FAQs for people who usually skip breakfast

    Can I make these parfait jars dairy free?

    Yes. Use a thick dairy-free yogurt you like the taste of and check that it’s gluten free. Coconut yogurt works well because it’s creamy. If protein is a concern, stir in a dairy-free protein powder or add hemp hearts and pumpkin seeds.

    What if I can’t handle oats, even gluten free ones?

    Skip the oats and use more chia seeds for thickness. You can also add crushed gluten free cornflakes or puffed rice right before eating for crunch. Another option is to layer yogurt with fruit and nut butter only.

    How can I keep fruit from getting watery?

    Use firm fruit like blueberries, diced apples, or strawberries patted dry. Keep fruit in the middle or top layer and add a squeeze of lemon. Avoid thawed frozen fruit in jars you plan to store more than 24 hours.

    I leave for work at 6 a.m. How do I eat this on the go?

    Assemble jars in 8-ounce containers with tight lids. Pack the granola in a small bag and a plastic spoon. If you need more ultra-fast ideas, check out a list of gluten free breakfasts for early mornings.

    How much protein should I aim for at breakfast to avoid a crash?

    Most adults feel steady with 15 to 25 grams. A jar with Greek yogurt, chia, and nuts usually lands in that range. If you’re hungry by 10 a.m., add a hard-boiled egg or stir protein powder into the yogurt.

    A quick note before you head out the door

    Breakfast does not need to be fancy to count. If you keep one or two of these ideas ready to go, you’ll stop skipping and start feeling steady all morning.

    Try the parfait jars this week. Once you find a favorite combo, make four at a time and you’ll have breakfast solved until Friday.

  • Gluten Free Breakfast for Big Families on One Shop

    Gluten Free Breakfast for Big Families on One Shop

    Feeding a crowd first thing in the morning can feel like herding kittens. This one-pan gluten free breakfast keeps everyone happy and fed without juggling skillets or making 12 different orders.

    We’ll shop once, cook on one sheet pan, and serve a hot, colorful breakfast that works for picky kids and hungry teens. It’s simple, flexible, and reliable for weekends, holidays, and sleepovers.

    Why This One-Pan Breakfast Works for Big Families

    This sheet pan method cooks potatoes, peppers, onions, and gluten free sausage together so you get crispy edges and sweet roasty flavor without babysitting the stove. Near the end, you make little wells and crack in eggs so everything finishes at the same time. It’s hearty, hands-off, and scales easily to feed a crowd.

    The ingredients are everyday staples, so you can do one efficient shop and know breakfast is covered. For households managing celiac or mixed-diet tables, it’s a safe option with bold flavor and minimal fuss. If you’re new to gluten free or cooking for someone who is, read about the cross-contamination mistakes that ruin a gluten free breakfast to keep your sheet pan truly safe.

    Prefer prepping ahead? You can chop everything the night before and even par-roast the potatoes. If you need more freezer-friendly ideas for future weekends, bookmark gluten free breakfasts that freeze well.

    What You’ll Need

    Simple produce, gluten free sausage, and a dozen eggs are the backbone here. Use a large rimmed sheet pan, 12×18 inches or bigger, so everything can spread out and crisp.

    • 3 lb russet potatoes, peeled if you like, cut in 3/4-inch cubes
    • 1/4 cup olive oil
    • 2 tsp kosher salt, divided
    • 1 tsp black pepper, divided
    • 2 tsp smoked paprika
    • 1 tsp garlic powder
    • 2 bell peppers, any colors, diced large
    • 1 large red onion, thinly sliced
    • 1 1/2 lb fully cooked gluten free chicken sausage, sliced into 1/2-inch coins
    • 12 large eggs
    • 1/2 cup milk or unsweetened dairy-free milk
    • 2 cups shredded sharp cheddar, optional
    • 1/2 cup sliced green onions
    • 1/4 cup chopped fresh parsley
    • hot sauce, for serving, optional

    How to Make the Sheet Pan Breakfast

    Roast the potatoes, add the veggies and sausage, then crack in eggs to finish.

    1. Preheat the oven to 425°F (220°C). Line a large rimmed sheet pan with parchment for easy cleanup, or lightly oil the pan.
    2. Toss the diced potatoes with olive oil, 1 1/2 teaspoons salt, 3/4 teaspoon pepper, smoked paprika, and garlic powder. Spread in a single layer on the sheet pan.
    3. Roast the potatoes on the center rack for 20 minutes, stirring once halfway, until the edges start to brown.
    4. Add the bell peppers, red onion, and sliced gluten free sausage to the pan. Toss gently to coat in the seasoned oil and spread back into a single layer.
    5. Return to the oven and roast for 10 to 12 minutes, until the onions soften and the sausage begins to crisp.
    6. While that cooks, whisk the eggs with the milk and a pinch of salt and pepper in a large bowl until well combined.
    7. Pull the pan from the oven and gently create 10 to 12 shallow wells among the potatoes and sausage. Pour a little of the egg mixture into each well, letting it flow to fill gaps. If using cheese, sprinkle it over the vegetables, avoiding the egg wells.
    8. Bake for 6 to 10 minutes, until the egg whites are set and the yolks are just soft, or longer if you prefer firmer eggs. Check at 6 minutes; carryover heat will finish the eggs.
    9. Remove from the oven and scatter green onions and parsley over the top. Let rest 3 minutes to settle.
    10. Slice or scoop portions and serve hot with hot sauce on the side.
    Overhead view of sheet pan breakfast bake for a crowd.

    Make-Ahead, Storage, and Reheating

    Chop potatoes, peppers, onions, and slice the sausage up to 24 hours ahead; store separately in airtight containers. You can even toss the potatoes with oil and spices, spread on the pan, and cover tightly so they’re ready to roast in the morning.

    Leftovers keep 3 to 4 days in the fridge. For the best texture, reheat portions in a skillet over medium with a splash of water and a lid for 3 to 5 minutes, or bake at 350°F (175°C) for 10 minutes. The eggs will firm a bit as they cool and reheat, but the flavor still shines. If you want a full plan for mornings, check out gluten free breakfast meal prep.

    Common Mistakes to Avoid

    • Crowding the pan: If the vegetables are piled high, they steam and turn soft. Use two sheet pans or bake in batches for crispy edges.
    • Skipping the high heat: Roasting at 425°F (220°C) creates color and flavor fast. Lower temperatures make soggy potatoes.
    • Cracking eggs too early: Add them only after the veggies are nearly done so the whites set and the yolks stay tender.
    • Uneven potato size: Keep dice around 3/4 inch so everything cooks evenly and on time.
    • Using sausage with hidden gluten: Double-check labels and buy certified gluten free sausage to avoid surprises.
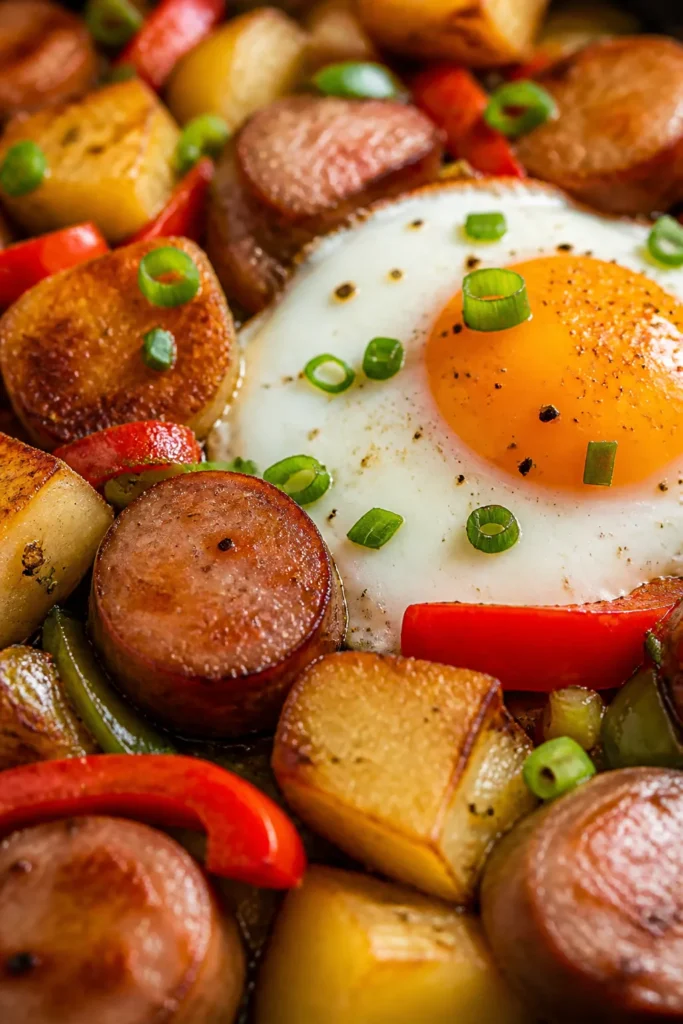
    Close-up of crispy potatoes, sausage, and soft-yolk egg.

    Variations and Easy Swaps

    • Veggie-heavy: Add zucchini or cherry tomatoes in the last 10 minutes for extra color and moisture.
    • Dairy-free: Skip the cheese or use a meltable dairy-free shreds blend. A drizzle of olive oil at the end adds richness.
    • Protein swap: Use uncured bacon pieces or turkey sausage; roast bacon on a separate rack or pan and toss in before the eggs.
    • Spice it your way: Try chili powder, Italian seasoning, or a pinch of cumin instead of smoked paprika.
    • No eggs: Roast cubed tofu tossed with oil, salt, pepper, and paprika on a separate quarter sheet pan until golden. For more ideas, see gluten free breakfast ideas without eggs.

    What to Serve With It

    This bake is a full meal, but a fresh side makes it feel special. Add a simple fruit salad, sliced avocado with lime and salt, or gluten free toast. If you want a sweet side for weekend mornings, pair it with gluten free pancakes that don’t crumble or blend one of these gluten free breakfast smoothies.

    Single serving of gluten free breakfast bake on a plate.

    Breakfast FAQs

    How do I scale this for 15 to 20 people?

    Double the recipe and roast on two full-size sheet pans, swapping racks halfway through so both pans crisp evenly. You can hold finished pans in a 200°F (95°C) oven, lightly tented with foil, while you cook the eggs on the second pan.

    Can I make it dairy-free?

    Yes. Skip the cheese or use a dairy-free alternative. The rest of the ingredients are naturally dairy-free. Add a drizzle of olive oil when serving for richness, or top with avocado.

    What if I don’t want to cook with eggs?

    Leave out the eggs and roast cubed, pressed tofu or canned chickpeas (drained and dried) on a separate pan until crispy. Serve with a tahini-lemon sauce or salsa for protein and moisture.

    How do I keep the potatoes crispy for serving?

    Use high heat, spread everything in a single layer, and avoid covering the pan after roasting. If they soften while you finish eggs, return the pan to the top rack for 3 to 5 minutes to re-crisp.

    Can I use sweet potatoes instead of russets?

    Absolutely. Dice to the same size and start checking a few minutes earlier. Sweet potatoes brown a touch faster and benefit from a pinch of cinnamon or chipotle powder.

    A Quick Thank You and Final Tip

    I hope this one-pan breakfast makes your busy mornings calmer and your table a little louder in the best way. Keep the spices on the potatoes and sausage, then season the eggs simply so every bite tastes balanced. Happy breakfast, and pass the hot sauce.

  • Gluten Free Breakfast Cereal: 7 Brands Worth the Money

    Gluten Free Breakfast Cereal: 7 Brands Worth the Money

    If you’re tired of spending on boxes that taste bland or go soggy in seconds, I’ve done the tasting and testing for you. Below you’ll find seven gluten free breakfast cereal brands that are actually worth the money, plus a simple homemade cereal recipe so you always have a backup that tastes fresh and crunchy.

    This post is friendly for celiac households too. I’ll flag the labels to look for, share storage ideas, and answer the questions I get most about oats, cross-contact, and how to keep cereal satisfying until lunch.

    Why this gluten free cereal guide and recipe work

    Great gluten free cereal needs three things: reliable gluten free labeling, real crunch, and balanced flavor. The seven brands below check those boxes without feeling like a compromise, and the homemade recipe gives you full control over sweetness, texture, and ingredients.

    Here are 7 brands that consistently deliver, with short notes on taste and texture:

    1. Purely Elizabeth Grain-Free Granola: Lightly sweet, big clusters, not too hard. Often baked with coconut sugar.
    2. Nature’s Path Mesa Sunrise: Flakes and puffs blend; stays crisp for a good 5 to 7 minutes in milk.
    3. Three Wishes Cereal: Protein-forward rings with a clean ingredient list; best with sliced banana.
    4. Barbara’s Puffins (GF varieties): Crunchy pillows that don’t shred the roof of your mouth.
    5. LUVOLOGY O’s (select GF flavors): Simple, not overly sweet; kid-friendly.
    6. One Degree Sprouted Oat O’s (certified GF): Gentle sweetness, sprouted oats for better texture.
    7. Lovebird Cereal: Short ingredient list, toasted flavor; great for snack mix.

    If you’re still getting hungry by 10 a.m., add protein on the side or stir in nuts and seeds. These tips pair well with my ideas in 6 Gluten Free Breakfast Mistakes That Make You Hungry by 10am and the quick tricks in 9 High-Protein Gluten Free Breakfast Ideas to Keep You Full Until Lunch.

    Ingredients for homemade gluten free breakfast cereal

    This baked cereal tastes like a cross between granola and crunchy muesli, with big toasty clusters. Use certified gluten free oats and check every label if serving someone with celiac disease.

    • 3 cups certified gluten free rolled oats
    • 2 cups puffed rice cereal (gluten free)
    • 1/2 cup raw almonds, chopped
    • 1/2 cup pecans, chopped
    • 1/3 cup pumpkin seeds
    • 1/4 cup sunflower seeds
    • 1/2 tsp fine sea salt
    • 1 1/2 tsp ground cinnamon
    • 1/2 tsp ground vanilla or vanilla extract
    • 1/2 cup maple syrup
    • 1/3 cup melted coconut oil
    • 1 egg white, lightly beaten, optional for extra clusters
    • 1 cup dried fruit (raisins, cherries, or blueberries), added after baking

    How to make it

    Mix, press firmly on the pan, bake until deeply golden, cool fully, then break into spoonable clusters.

    1. Preheat the oven to 325°F (165°C). Line a large rimmed sheet pan with parchment paper.
    2. In a big bowl, combine oats, puffed rice, almonds, pecans, pumpkin seeds, sunflower seeds, salt, and cinnamon. Stir until evenly mixed.
    3. In a small bowl, whisk maple syrup, melted coconut oil, and vanilla. If using the egg white for extra clusters, whisk it in now.
    4. Pour the wet mixture over the dry ingredients and stir until every flake and seed looks lightly coated. Take an extra 30 seconds to scrape the bottom.
    5. Spread the mixture on the lined sheet pan and press it firmly into an even layer about 1/2 inch thick. Pressing helps create big clusters.
    6. Bake for 15 minutes, rotate the pan, and gently break the slab into a few large sections. Bake another 10 to 13 minutes until the edges are deep golden and fragrant.
    7. Place the pan on a rack and cool completely, 45 to 60 minutes. Do not stir while cooling; this sets the clusters.
    8. Break into spoonable pieces and stir in the dried fruit. Taste and add a pinch more salt if needed, then store airtight.
    Overhead pan of golden gluten free cereal clusters

    Storage, make-ahead and reheating

    Let the cereal cool completely on the pan. Warm cereal trapped in a jar makes steam, which softens your crunch and shortens shelf life. Once cool, store in an airtight container at room temperature for up to 3 weeks. For extra insurance, tuck a small square of parchment on top to absorb any stray moisture.

    To freeze, portion the cereal in zip-top freezer bags, press out air, and freeze for up to 3 months. Thaw on the counter in the sealed bag to prevent condensation. If it ever loses a little snap, spread on a sheet pan and refresh at 300°F (150°C) for 5 to 8 minutes, then cool.

    Need more ideas for prepping ahead? You might like my Gluten Free Breakfast Meal Prep: 5 Days in 40 Minutes and these freezer-friendly options in 10 Gluten Free Breakfast Ideas That Freeze Well.

    Common mistakes to avoid

    • Skipping certified GF oats: Regular oats are often cross-contaminated. Look for certified gluten free on oats and any puffed grains.
    • Underbaking the cereal: Pale oats turn soft in milk. Bake until you see even golden-brown edges and smell a nutty aroma.
    • Over-stirring during baking: Stir just once. Too much stirring breaks clusters and dries the cereal.
    • Bottling while warm: Trapped steam makes soggy cereal. Cool completely before sealing.
    • Heavy-handed sweeteners: Excess syrup leads to sticky clumps. Measure carefully and press the mixture flat for crisp clusters.
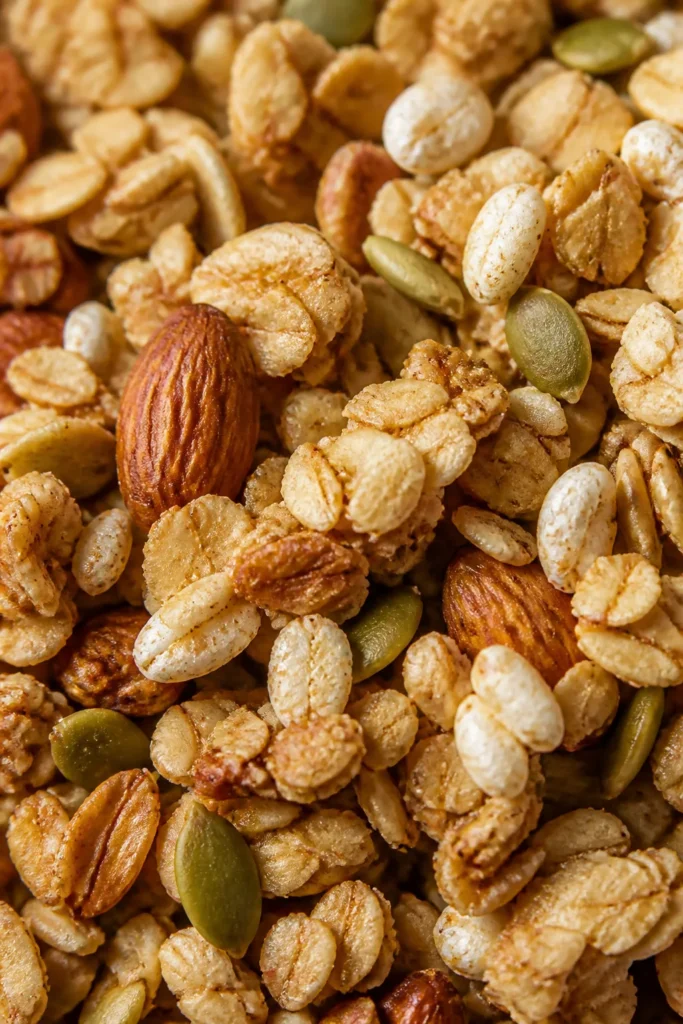
    Close-up of crunchy gluten free cereal texture

    Variations and substitutions

    • Nut-free: Swap almonds and pecans for pumpkin and sunflower seeds, and add shredded coconut for extra texture.
    • Low-sugar: Reduce maple syrup to 1/3 cup and add 1 beaten egg white to help clusters form without extra sweetness.
    • Grain-free: Replace oats with 3 cups mixed nuts and seeds; bake 10 to 12 minutes less and watch closely.
    • Spice it up: Add 1/2 tsp ground ginger or cardamom, or a pinch of nutmeg.
    • Fruit add-ins: Stir in 1 cup chopped dried fruit after baking to prevent scorching.
    • Extra protein: Mix in 1/4 cup ground flax or hemp hearts before baking, or serve with Greek yogurt.

    What to serve with gluten free cereal

    Top your bowl with sliced banana, strawberries, or blueberries and pour over cold milk or a dairy-free option. For more staying power, add a spoonful of peanut butter or a handful of chopped nuts. I also love a scoop over yogurt, like in The 5-Minute Gluten Free Breakfast I Make Every Single Morning.

    If you’re sensitive to oats, read this first: Gluten Free Breakfast Oats: What Celiacs Need to Know First. For busy mornings, grab-and-go ideas are here: Gluten Free Breakfast on the Go: 10 Ideas for People Who Leave at 6am.

    Single serving of gluten free cereal with fruit and milk

    Questions readers ask about gluten free cereal

    How do I know if a cereal is truly gluten free?

    Look for a clear gluten free claim on the front and scan the ingredient list for wheat, barley, rye, or malt. For oats, choose products made with certified gluten free oats. If you have celiac disease, also check the brand’s allergen statement and manufacturing practices for cross-contact information.

    Which gluten free cereal stays crisp the longest in milk?

    From this list, Nature’s Path Mesa Sunrise and Barbara’s Puffins (GF varieties) hold up well for several minutes. Clustered styles like certain granolas also stay crunchy thanks to their baked coating. For any cereal, use cold milk and don’t pour too early.

    Can I make this cereal without nuts for school lunches?

    Yes. Replace almonds and pecans with more pumpkin and sunflower seeds, and add unsweetened shredded coconut for body. The clusters still form well and bake in about the same time. Always check school allergy policies and labels on seeds and coconut.

    Is it cheaper to make gluten free cereal at home?

    Usually, yes. Buying oats, puffed rice, and seeds in bulk keeps the cost per serving down. Store-bought cereals are convenient, but a homemade batch often comes in at roughly half the price of premium boxes and tastes fresher.

    What milk alternatives taste best with gluten free cereal?

    For a creamy bowl, try whole milk, lactose-free milk, or barista-style oat milk made with certified gluten free oats. Almond milk and cashew milk are lighter and let spices shine. If you want extra protein, choose ultra-filtered milk or pair with Greek yogurt.

    Final thoughts

    Great gluten free breakfast cereal exists, and you don’t need a huge budget to enjoy it. Keep one or two trusted brands in the pantry, and make a batch of this homemade version for fresher flavor and big, toasty clusters.

    With the right label checks and a few smart additions for protein and fiber, your cereal can be fast, satisfying, and genuinely delicious. Here’s to better mornings in a bowl.

  • Gluten Free Breakfast Pancakes That Don’t Crumble

    Gluten Free Breakfast Pancakes That Don’t Crumble

    I wanted pancakes that were fluffy, tender and actually stayed in one piece. After too many batches that broke at the flip, this is the gluten free pancake recipe I trust on busy mornings and lazy weekends alike.

    They’re soft inside, golden at the edges and hold together on the spatula. No crumble, no grit, just pancakes that behave like the ones you remember.

    Why These Gluten Free Pancakes Don’t Crumble

    Gluten free batters need a few helpers to stay cohesive. This recipe uses a balanced flour blend plus a little almond flour for tenderness and structure, and a touch of starch for crisp edges that protect the soft center. Buttermilk and yogurt add moisture and gentle acidity so baking powder and soda lift the batter without making it dry.

    The other make-or-break is technique. A short 10-minute batter rest hydrates the flours so they set as a unified cake, not sandy bits. Cooking on medium heat gives you time to see bubbles form and edges look matte before flipping, which is your cue for a clean turn.

    If you’re new to gluten free breakfasts, these pancakes play well with other smart habits. For more tips on staying full and satisfied, this guide to common gluten free breakfast mistakes is a helpful read. And if cross-contact is a concern in your kitchen, review the cross-contamination mistakes that ruin a gluten free breakfast so your pancakes stay safe.

    What You’ll Need

    A sturdy blend, enough moisture and the right leavening make all the difference. Here are the ingredients that create fluffy pancakes that hold together.

    • 1 cup gluten free all-purpose flour blend, with xanthan gum
    • 1/2 cup almond flour, finely ground
    • 2 tbsp cornstarch, or tapioca starch
    • 2 tbsp granulated sugar
    • 2 tsp baking powder, gluten free
    • 1/4 tsp baking soda
    • 1/2 tsp fine sea salt
    • 1 cup buttermilk, room temperature
    • 1/2 cup plain yogurt, Greek or regular; room temperature
    • 2 large eggs, room temperature
    • 2 tbsp unsalted butter, melted and cooled; or neutral oil
    • 1 tsp vanilla extract
    • butter or oil for the pan
    • 1/2-2/3 cup add-ins like blueberries or chocolate chips, optional

    Step-by-Step: Pancakes That Hold Together

    Follow these simple steps and watch for the doneness cues for clean flips and soft, stackable pancakes.

    1. Preheat a griddle to 375°F (190°C) or heat a large nonstick skillet over medium heat. Lightly grease with butter or oil.
    2. In a large bowl, whisk the gluten free flour blend, almond flour, cornstarch, sugar, baking powder, baking soda and salt until well combined.
    3. In a separate bowl, whisk the buttermilk, yogurt, eggs, melted butter and vanilla until smooth.
    4. Pour the wet ingredients into the dry and stir with a spatula until just combined. The batter should be thick but pourable with small lumps.
    5. Let the batter rest for 10 minutes to fully hydrate. If it thickens too much, stir in 1 to 3 tablespoons milk to loosen.
    6. For each pancake, pour about 1/4 cup batter onto the hot surface. If using add-ins, sprinkle them evenly over the wet batter in the pan.
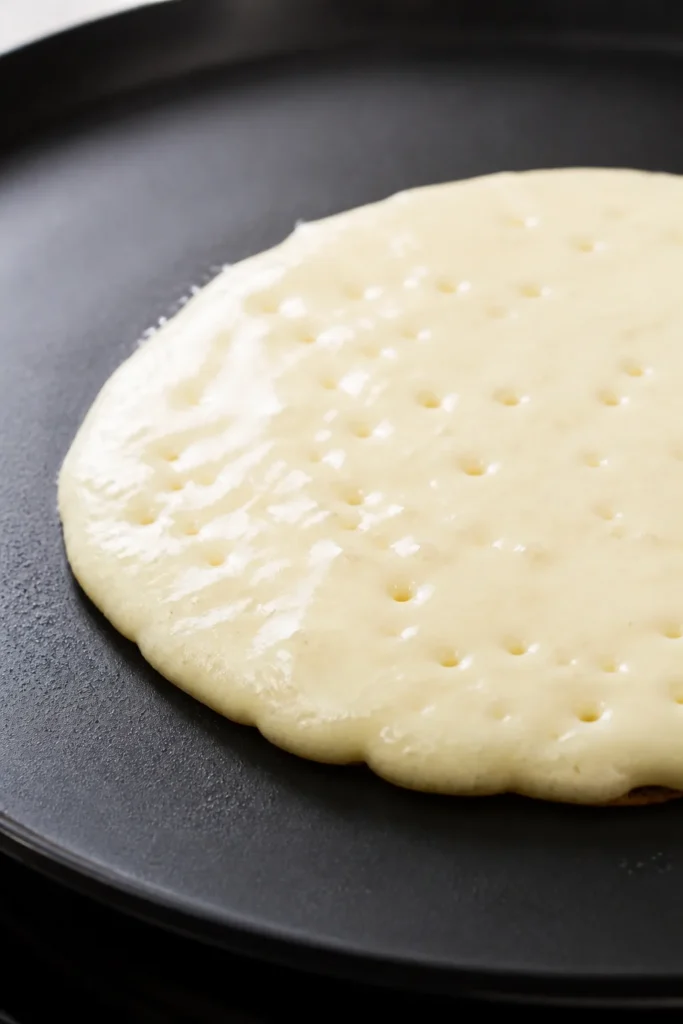
    7. Cook until bubbles form across the top and the edges look matte, 2 to 3 minutes. Flip gently and cook until the underside is golden and the center feels set, 1 to 2 minutes more.
    8. Transfer to a wire rack or a 200°F (95°C) oven to keep warm while you cook the remaining batter, greasing the pan between batches as needed.

    Make-Ahead, Storage and Reheating

    Let cooked pancakes cool completely on a wire rack so steam doesn’t make them soggy. Store in an airtight container in the fridge for up to 4 days. For longer storage, freeze in a single layer, then stack with parchment and keep in a freezer bag for up to 2 months.

    Reheat from chilled in a 300°F (150°C) oven for 8 to 10 minutes or in a dry skillet over medium heat for 1 to 2 minutes per side. From frozen, pop them in the toaster or air fryer at 320°F (160°C) until warmed through and lightly crisp at the edges. The structure holds up nicely to reheating.

    Doing a bigger breakfast prep? Pair a batch of these with ideas from Gluten Free Breakfast Meal Prep: 5 Days in 40 Minutes so weekday mornings feel easy.

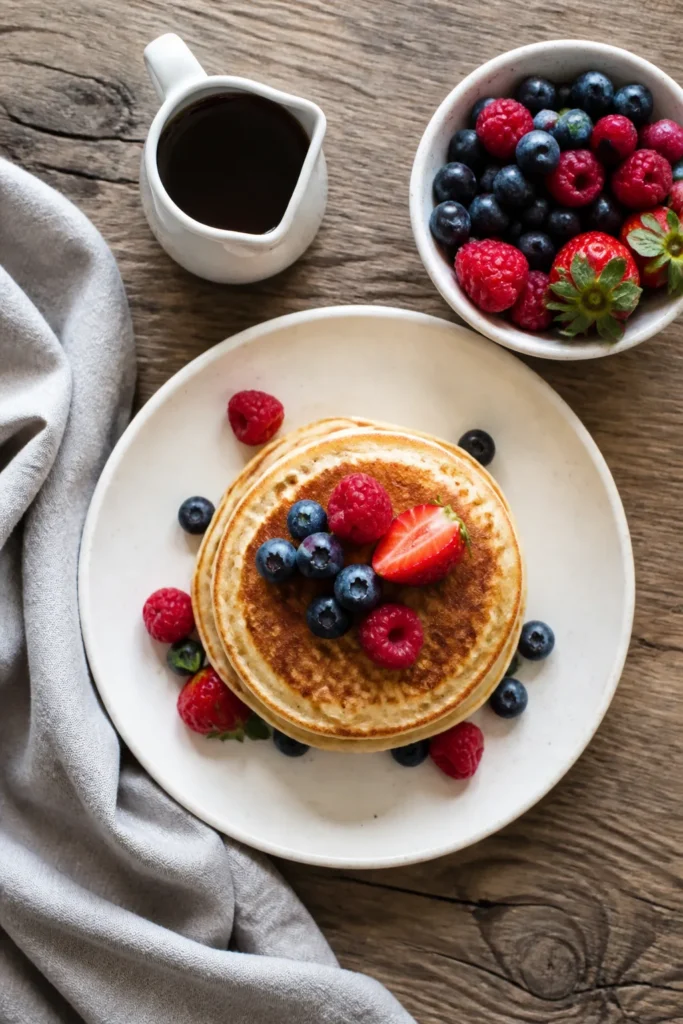
    Overhead view of gluten free pancake stack with syrup and berries

    Mistakes That Cause Crumbly Pancakes

    • Using a flour blend without binders: Choose a gluten free all-purpose blend that includes xanthan gum or add 1/4 teaspoon yourself so the pancakes don’t break.
    • Skipping the batter rest: Hydration takes time. Resting 10 minutes lets the flour absorb liquid and creates a cohesive, scoopable batter.
    • Cooking too hot: High heat scorches the outside while the center stays unset, which makes pancakes tear. Medium heat gives an even set.
    • Flipping too early: Wait for bubbles across the surface and mattified edges before flipping. That visual cue is your built-in timer.
    • Overmixing the wet into the dry: Stir until just combined. A few small lumps are fine and actually help tenderness.

    Easy Variations and Smart Substitutions

    • Dairy-free: Use unsweetened almond milk mixed with 2 teaspoons lemon juice in place of buttermilk, and coconut yogurt or a thick dairy-free yogurt for the yogurt. Swap melted butter with light olive oil.
    • No almond flour: Replace with 1/3 cup additional gluten free flour blend plus 2 tablespoons finely ground oat flour, certified gluten free.
    • Higher protein: Stir in 1 scoop unflavored or vanilla whey or plant protein and add 2 to 4 tablespoons extra milk to maintain a pourable batter. For more ideas, see high-protein gluten free breakfast ideas.
    • Blueberry or chocolate chip: Sprinkle 1/3 cup berries or chips over each pancake right after pouring the batter into the pan so they don’t sink or scorch.
    • Whole-grain vibe: Swap 1/4 cup of the blend for certified gluten free buckwheat flour for a toasty flavor that still holds together.
    Pancakes bubbling on skillet ready to flip

    What To Serve With These Pancakes

    We like warm maple syrup, a pat of butter and fresh berries. For a savory balance, add crispy bacon or sausage and a side of scrambled eggs. If you want a bread basket vibe for a crowd, these gluten free breakfast rolls that actually rise are a great partner on the table.

    For quick mornings, pair a reheated stack with a blender drink from gluten free breakfast smoothies and head out the door satisfied.

    Your Questions, Answered

    Can I use a single flour, like rice flour, instead of a blend?

    A single flour tends to be gritty or fragile. A gluten free all-purpose blend that includes rice flour, starches and a binder like xanthan gives better texture and structure. If you only have rice flour, add tapioca or cornstarch for tenderness and a small amount of xanthan gum.

    How do I know when to flip gluten free pancakes?

    Watch for steady bubbles across the surface, especially toward the center, and edges that lose their wet shine. Slide your spatula under the pancake; if it lifts in one piece without bending too much, it’s ready. This is usually 2 to 3 minutes on medium heat.

    Why is my batter too thick or too thin?

    Flour blends vary in absorbency. After the 10-minute rest, adjust with 1 to 3 tablespoons milk if it’s too thick, or 1 to 2 teaspoons flour blend if it’s runny. Aim for a thick but pourable batter that slowly ribbons off a spoon.

    Can I make the batter the night before?

    Yes, but reduce the baking powder by 1/2 teaspoon and add 1/4 teaspoon just before cooking to refresh lift. Store the batter covered in the fridge. The texture will thicken overnight, so loosen with a splash of milk in the morning.

    What’s the best pan temperature?

    A griddle at 375°F (190°C) or a skillet over medium heat works well. Test with a small spoonful of batter: it should sizzle gently and form bubbles within a minute without smoking. Too hot leads to scorched outsides and crumbly flips.

    A Warm Finish

    I hope these pancakes find a spot in your weekend rotation. They’re simple to mix, easy to flip and the stack holds together from skillet to plate. If you make them, leave a note with your favorite add-ins so we can all try something new next time.

  • 9 Gluten Free Breakfast Ideas for When You’re Sick of Eggs

    9 Gluten Free Breakfast Ideas for When You’re Sick of Eggs

    If you love a hot breakfast but can’t do eggs every morning, you’re in the right place. Today I’m sharing nine gluten free, egg-free ideas that taste good, keep you full, and actually fit a busy morning.

    To make it extra helpful, there’s a full recipe for a savory chickpea sweet potato hash below. It’s hearty, high in fiber and protein, and works for meal prep. The other eight ideas are listed throughout, so you can mix and match all week.

    Why these gluten free, egg-free breakfasts work

    Eggs are easy, but variety matters. These ideas focus on three things: fiber to keep you full, protein to steady energy, and fast prep so breakfast doesn’t become a project. You’ll see pantry-friendly options, make-ahead bakes, and savory bowls that feel like a real meal.

    Here are nine egg-free gluten free breakfasts I make on repeat:

    • Chickpea Sweet Potato Hash with peppers and greens (full recipe below)
    • Warm Quinoa Breakfast Bowl with berries, almond butter and cinnamon
    • Yogurt Parfait with certified gluten free granola, chia seeds and fruit
    • Smoked Salmon Rice Bowl with avocado, cucumbers and tamari
    • Peanut Butter Banana Oats made with certified gluten free oats
    • Frozen Berry Smoothie with hemp hearts and peanut butter
    • Cottage Cheese Toast on gluten free bread with tomatoes and olive oil
    • Chia Pudding made the night before with coconut milk and maple
    • Leftover Veggie Fried Rice using day-old rice and tamari

    If you’re new to gluten free breakfast, read what celiacs need to check before they eat breakfast. Worried about cross-contact in shared kitchens? These tips on common cross-contamination mistakes at breakfast are worth a scan. And if smoothies are more your style, try these gluten free smoothies that don’t taste like sadness.

    Ingredients for Chickpea Sweet Potato Breakfast Hash

    Simple vegetables, pantry spices, and canned chickpeas make a fast, filling skillet. Use certified gluten free labels on spices, stock and sauces if you need them.

    • 2 tbsp olive oil
    • 1 lb sweet potatoes, peeled and cut into 1/2-inch cubes
    • 1 red bell pepper, diced
    • 1/2 red onion, thinly sliced
    • 2 cloves garlic, minced
    • 1 can chickpeas, 15 oz, drained, rinsed and patted dry
    • 1 tsp smoked paprika
    • 1 tsp ground cumin
    • 1/4 tsp red pepper flakes, optional
    • 1/2 tsp fine sea salt, plus more to taste
    • 1/4 tsp black pepper
    • 3 cups baby spinach, loosely packed
    • 1/2 lemon, juiced
    • 1 avocado, sliced, for serving
    • 2 tbsp fresh cilantro, chopped
    • gluten free hot sauce, to taste, for serving

    How to make the hash

    Grab a big skillet and follow these easy steps.

    1. Heat a large 12-inch skillet over medium heat. Add 1 tablespoon olive oil.
    2. Add the sweet potatoes and 1/4 teaspoon salt. Cook, stirring every 2 to 3 minutes, until browned on the edges and fork-tender, 10 to 12 minutes. If the pan looks dry, add 1 to 2 teaspoons more oil.
    3. Push the sweet potatoes to one side. Add the remaining 1 tablespoon oil to the empty side, then add the red onion and bell pepper. Cook until softened and lightly caramelized, 4 to 5 minutes.
    4. Stir in the garlic and cook until fragrant, 30 seconds.
    5. Add the dried chickpeas to the skillet in an even layer. Let them sit undisturbed for 2 minutes to crisp slightly, then stir.
    6. Sprinkle smoked paprika, cumin and red pepper flakes over the pan. Add the remaining 1/4 teaspoon salt and black pepper. Stir to coat and cook 1 to 2 minutes until the spices smell toasty.
    7. Add the spinach and toss just until wilted, 30 to 60 seconds.
    8. Squeeze in the lemon juice and taste. Add a pinch more salt or a splash of hot sauce if needed.
    9. Serve warm topped with avocado slices, chopped cilantro and more hot sauce to taste.
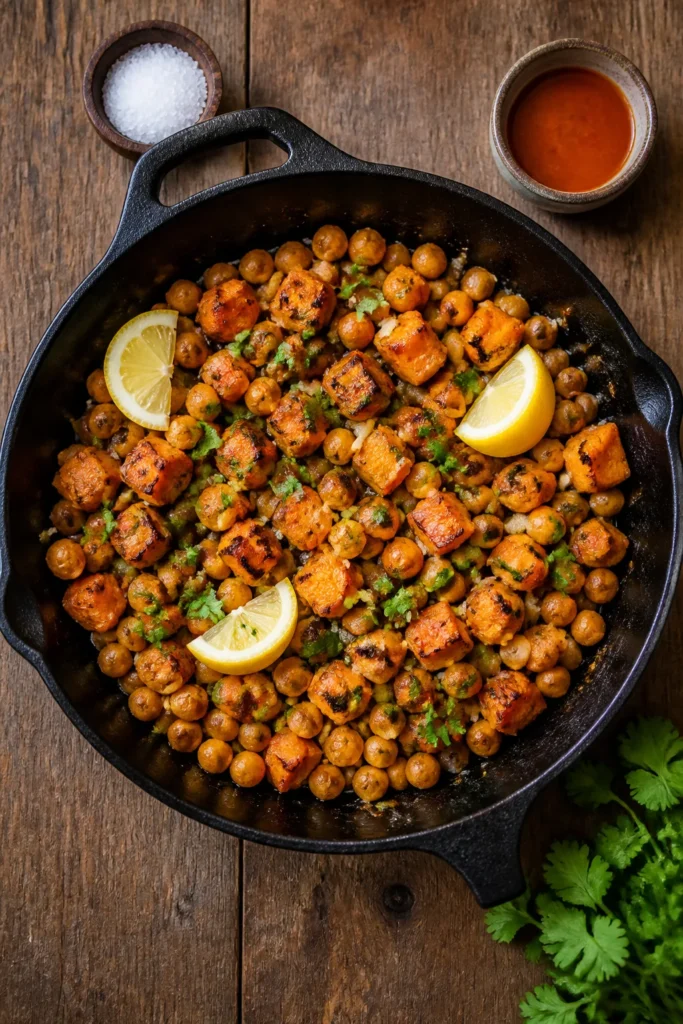
    Overhead view of chickpea sweet potato hash with herbs and lemon.

    Storage, make-ahead and reheating

    This hash is meal-prep gold. Cool completely, then store in an airtight container for up to 4 days. It also freezes well for up to 2 months. Portion it into single servings so it thaws quickly.

    Reheat in a skillet over medium heat with a splash of water or stock for 3 to 5 minutes until hot and a little crispy again. Microwave works in a pinch, 60 to 90 seconds per serving, stirring halfway. Add fresh toppings after heating for the best texture.

    Want a full week done fast? Check out the 40-minute plan in gluten free breakfast meal prep. For budget-friendly mornings, these gluten free breakfasts under $1 a serving help stretch the pantry.

    Common mistakes to avoid

    • Not drying the chickpeas: Wet chickpeas steam instead of crisp. Pat them dry with a clean towel before cooking.
    • Crowding the pan: Too many vegetables at once leads to sogginess. Use a large 12-inch skillet or cook in two batches.
    • Undercooking the sweet potatoes: Dice them small, about 1/2 inch, and give them time to brown and soften before adding greens.
    • Adding greens too early: Spinach goes in last. It only needs 30 to 60 seconds to wilt.
    • Forgetting acid and salt: A squeeze of lemon and a final pinch of salt wake up the whole skillet.
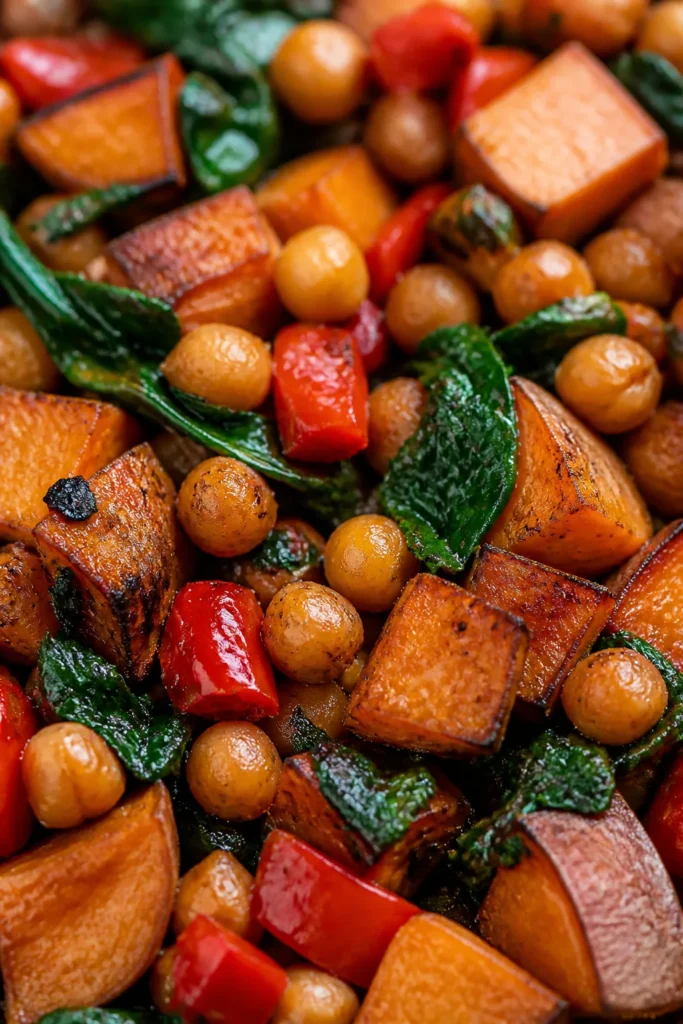
    Close-up of crispy chickpeas and caramelized sweet potatoes in the hash.

    Variations and substitutions

    • Swap the base: Use butternut squash or Yukon gold potatoes instead of sweet potatoes. Keep cubes at 1/2 inch for even cooking.
    • Use different beans: White beans or black beans work well. Drain and rinse, then dry thoroughly.
    • Spice it your way: Try curry powder instead of paprika and cumin, or add a pinch of cinnamon with the sweet potatoes.
    • Protein boost: Add crumbled firm tofu or diced chicken sausage in step 5 and cook until browned. Confirm sausage is gluten free.
    • Low FODMAP tweak: Use the green tops of scallions instead of onion and garlic-infused oil instead of fresh garlic.
    • Make it saucy: Finish with tahini lemon sauce or a drizzle of gluten free hot sauce for heat.
    • Breakfast bowl: Serve over warm quinoa or leftover rice, then top with avocado and herbs.

    What to serve with it

    Round it out with sliced avocado, orange segments, or a small bowl of berries. Add a dollop of cottage cheese or a spoon of hummus for extra protein if you like dairy or legumes in the morning.

    A piece of sturdy gluten free toast on the side makes it extra satisfying. If you need a reliable loaf, try the one in gluten free breakfast bread that actually rises.

    Single bowl of chickpea sweet potato hash with avocado.

    Reader questions

    Are oats safe for a gluten free breakfast?

    Use certified gluten free oats. Regular oats are often contaminated during processing. Start with small portions if you’re new to oats to see how you feel, and read more in the guide to gluten free breakfast oats on the site.

    Can I make the hash without nightshades?

    Yes. Swap the bell pepper for zucchini and use sweet paprika that is not spicy, or skip paprika altogether. Add extra cumin or a mild curry for flavor.

    What’s a fast high-protein option with no eggs?

    Greek yogurt with gluten free granola, chia seeds and berries is quick and balanced. A smoked salmon rice bowl with avocado is another great 10-minute, protein-forward breakfast.

    How do I keep gluten free toast from crumbling?

    Toast it a little longer than wheat bread, let it sit 1 minute before topping, and choose a slice with psyllium or eggs for structure if you tolerate them. For an egg-free loaf, look for brands using psyllium husk and starch blends.

    Can I prep the other eight ideas ahead too?

    Yes. Cook a pot of quinoa, portion smoothie packs, and assemble chia pudding in jars. Wash and chop fruit on Sunday so parfaits and bowls come together fast.

    A quick, cozy wrap-up

    I hope these ideas spark a week of breakfasts you actually want to eat. Keep the hash in your back pocket for busy mornings, then rotate the other eight ideas so eggs can take a well-earned day off.

    If you try the skillet, leave a note with your favorite add-ins. Happy breakfasting.

  • 10 Gluten Free Breakfast Ideas That Freeze Well

    Busy mornings feel a lot calmer when breakfast is already done. This guide gives you 10 gluten free breakfast ideas that freeze well, plus a simple recipe for freezer-friendly egg muffins you can customize with what you have.

    I’ll show you how to cool, wrap, label, freeze and reheat so everything tastes fresh. You’ll find options for sweet, savory, protein-packed and kid-approved, all with ingredients you can actually find.

    Why these gluten free freezer breakfasts work

    Freezer breakfasts only taste good if the texture survives the chill. These ideas are chosen because they reheat without getting soggy or rubbery, and they use ingredients that naturally hold up, like eggs, hearty veggies, cooked meats, rice, and sturdy gluten free flours.

    Here are 10 gluten free breakfast ideas that freeze well, with quick notes on how to pack and reheat:

    • Egg Muffins: Bake in a muffin pan, cool, wrap and freeze. Reheat 60–90 seconds in the microwave.
    • Breakfast Burritos with gluten free tortillas: Fill with eggs, potatoes, and cheese. Wrap in foil, then a freezer bag. Reheat in the oven at 350°F (175°C) for 20–25 minutes.
    • Oat Flour Waffles (certified GF oats): Freeze in a single layer, then bag. Reheat in a toaster until crisp.
    • Hash Brown and Sausage Bake: Cut into squares, wrap and freeze. Reheat covered at 350°F (175°C) for 15–20 minutes.
    • Quinoa Breakfast Bowls: Freeze quinoa and cooked add-ins in portions. Reheat and add fresh toppings.
    • Gluten Free Pancakes: Stack with parchment between, freeze flat. Reheat in the toaster or a skillet over low heat.
    • Chorizo and Veggie Frittata: Bake in a square pan, cool, slice, wrap. Reheat in a 300°F (150°C) oven 10–12 minutes.
    • Breakfast Sandwiches on GF English muffins: Assemble, cool, wrap individually. Reheat 30 seconds to thaw, then toast.
    • Turkey and Sweet Potato Patties: Cook, cool, freeze on a sheet, then bag. Reheat in a skillet 3–4 minutes per side.
    • GF Banana Oat Muffins (certified GF oats): Wrap individually. Reheat 20–30 seconds in the microwave or warm in a 300°F (150°C) oven.

    If you’re new to safe gluten free meal prep, read this quick guide on avoiding cross-contamination at breakfast. For a fast weekly plan, this 5-day gluten free breakfast meal prep shows how I batch and freeze without spending all Sunday in the kitchen.

    Ingredients for Freezer-Friendly Gluten Free Egg Muffins

    Egg muffins are the workhorse of any gluten free freezer stash. Use the base below, then add your favorite veggies and protein.

    • 10 large eggs
    • 1/2 cup milk, dairy or unsweetened almond milk
    • 1/2 tsp kosher salt
    • 1/4 tsp black pepper, freshly ground
    • 1 cup shredded cheddar cheese, or dairy-free cheddar
    • 1 cup bell pepper, diced small
    • 1 cup baby spinach, chopped
    • 1/2 cup green onions, thinly sliced
    • 8 oz gluten free breakfast sausage, cooked and crumbled; or use cooked bacon
    • 1 tbsp olive oil, for greasing pan if not using liners

    How to make and freeze the egg muffins

    Mix, bake, cool completely, then wrap and freeze for grab-and-heat breakfasts.

    1. Preheat the oven to 350°F (175°C). Lightly grease a 12-cup muffin pan with olive oil or line with parchment or silicone liners.
    2. In a large bowl, whisk the eggs, milk, salt, and pepper until well combined and slightly frothy, about 30 seconds.
    3. Stir in the cheddar, bell pepper, spinach, green onions, and cooked sausage until evenly distributed.
    4. Divide the mixture among the 12 muffin cups, filling each about 3/4 full. Stir the bowl occasionally so the fillings stay suspended.
    5. Bake for 18–22 minutes, until the centers are just set and a toothpick comes out with a few moist crumbs. The tops should look puffed and lightly golden.
    6. Cool the pan on a rack for 5 minutes, then gently loosen the edges with a thin spatula and transfer muffins to the rack to cool completely, about 20 minutes.
    7. To freeze, wrap each cooled muffin tightly in plastic or parchment, then place in a labeled freezer bag or airtight container. Freeze up to 3 months.
    8. To reheat from frozen, microwave 60–90 seconds, flipping halfway, until hot in the center. Or reheat in a 300°F (150°C) oven for 10–12 minutes.

    Storage, make-ahead and reheating

    Cool cooked items to room temperature before freezing. Heat escapes as steam, and if you wrap food while it is hot the moisture turns to ice crystals that cause soggy textures. Cool completely and pat any condensation dry.

    For storage, wrap individually in plastic or parchment and slide into a labeled freezer bag or airtight container. Squeeze out as much air as possible. Most items keep 2–3 months. For best flavor, aim to eat them within 6 weeks.

    To reheat egg muffins: microwave from frozen for 60–90 seconds, flipping halfway. Or reheat in a 300°F (150°C) oven for 10–12 minutes. For burritos and casseroles, reheat covered at 325–350°F (165–175°C) until the center reads 165°F (74°C). Toast waffles and pancakes straight from frozen so they get crisp.

    If you prefer fast mornings that still taste fresh, pair this with the ideas in make-ahead gluten free breakfasts you prep on Sunday.

    Common mistakes to avoid

    • Skipping the cool-down: Trapping steam creates ice and soggy edges. Cool on a rack until no longer warm.
    • Overloading with watery veggies: Zucchini and mushrooms need a quick sauté to drive off moisture before mixing into eggs.
    • Forgetting to season: Freezing dulls flavors. Salt and pepper the egg base and taste your fillings before baking.
    • Poor wrapping: Air is the enemy. Wrap tightly, label with the date, and use within a couple months.
    • Using flimsy gluten free tortillas: For burritos, pick pliable tortillas and warm them before rolling so they do not crack.

    Variations and substitutions

    • Dairy-free: Swap milk for unsweetened almond milk and cheese for a dairy-free cheddar. Grease tins with olive oil.
    • Veg-load: Add sautéed mushrooms, onions, or broccoli. Keep the total add-ins to about 2 cups so muffins set well.
    • High-protein: Stir in diced ham, cooked turkey sausage, or black beans. Aim for 1 to 1 1/2 cups of protein total.
    • Spice blends: Try taco seasoning, Italian herbs, or smoked paprika. Start with 1 teaspoon and adjust to taste.
    • Cheese swap: Use pepper jack for heat, feta for tang, or Swiss for nuttiness. Shred for even melting.

    What to serve with these freezer breakfasts

    Round out the plate with fresh fruit, avocado slices, salsa, or a spoon of Greek yogurt. A small side salad turns egg muffins or frittata squares into a full brunch. If you like something lighter on weekdays, try this fast option: the 5-minute gluten free yogurt bowl I make every morning.

    Frequently asked questions

    Can I use paper liners for egg muffins so they do not stick?

    Yes, use parchment paper liners or silicone liners. Standard paper liners can stick to eggs. If you do not have liners, grease the pan well with olive oil or butter and let muffins cool 5–10 minutes before loosening with a thin spatula.

    How long do gluten free freezer breakfasts last?

    Most cooked items taste best within 2–3 months. For peak flavor and texture, aim for 4–6 weeks. Always label with the date and reheat until the center reaches 165°F (74°C).

    Which gluten free tortillas work best for freezing burritos?

    Choose pliable brands labeled gluten free that bend without cracking. Warm each tortilla in a dry skillet for 10–15 seconds before filling to prevent splitting, then wrap tightly in foil before freezing.

    Can I freeze cooked bacon or sausage to add later?

    Absolutely. Cook, cool, and freeze in portions. Reheat quickly in a skillet or microwave, then tuck into egg muffins, breakfast bowls, or sandwiches. Check the meat label to confirm it is gluten free.

    Do gluten free waffles and pancakes stay crisp after freezing?

    They do if you reheat in a toaster or hot dry skillet. Freeze them in a single layer first, then bag with parchment between pieces so steam can escape and edges crisp up.

    A quick wrap-up

    Make one batch today and thank yourself all week. Start with the egg muffins, add a tray of waffles or a pan of hash brown bake, and you have breakfasts ready for busy mornings. Label, freeze, and reheat with confidence. Breakfast is handled.

  • The 5-Minute Gluten Free Breakfast I Make Every Single Morning

    The 5-Minute Gluten Free Breakfast I Make Every Single Morning

    I am not a morning chef. I need something fast, filling, and gluten free without a pan in sight. This yogurt bowl is the breakfast I make every single morning in about five minutes flat.

    It checks all the boxes: creamy, crunchy, a little sweet, and packed with protein. I keep the base the same and swap the toppings depending on what’s in the fridge. Once you try it, you’ll see why it sticks.

    Why This 5-Minute Bowl Works

    This bowl delivers steady energy without fuss. Greek yogurt brings protein for staying power, fruit adds natural sweetness and fiber, and a spoon of nut butter makes it satisfying. It takes five minutes, no cooking, and the formula is flexible so you can use what you have.

    It’s also easy to keep safe for gluten free eaters. I use certified gluten free oats or granola, or swap in nuts when I’m out. If you’re curious about oats and cross-contact, this guide is helpful: what celiacs need to know about gluten free oats. And if mornings are chaotic, these ideas for gluten free breakfasts on the go pair well with this bowl when you need to eat in the car.

    Ingredients You’ll Need

    Simple, pantry-friendly staples that taste good even before coffee. The only non-negotiable is that any oats or granola must be clearly labeled certified gluten free.

    • 3/4 cup plain Greek yogurt (2% or 5%)
    • 1/2 cup mixed berries, fresh or thawed frozen
    • 1/2 banana, sliced
    • 2 tbsp certified gluten free rolled oats or granola
    • 1 tbsp peanut butter or almond butter, room temperature for easy drizzling
    • 2 tsp chia seeds
    • 1 tsp honey or maple syrup, to taste
    • 1/8 tsp ground cinnamon
    • pinch of fine sea salt, optional

    How to Make It in 5 Minutes

    Stir the creamy base, pile on fruit and crunch, and finish with a drizzle.

    1. Add the Greek yogurt to a medium bowl and stir until smooth and creamy.
    2. Sprinkle in the chia seeds, cinnamon, and a tiny pinch of sea salt. Stir to combine so the spices are evenly distributed.
    3. Top with mixed berries and banana slices, spreading them out so every bite gets fruit.
    4. Add the certified gluten free oats or granola for crunch.
    5. Warm the nut butter if needed so it drizzles easily, then spoon it over the top.
    6. Finish with a light drizzle of honey or maple syrup. Taste and adjust sweetness or salt as you like. Eat right away while the granola is crunchy.
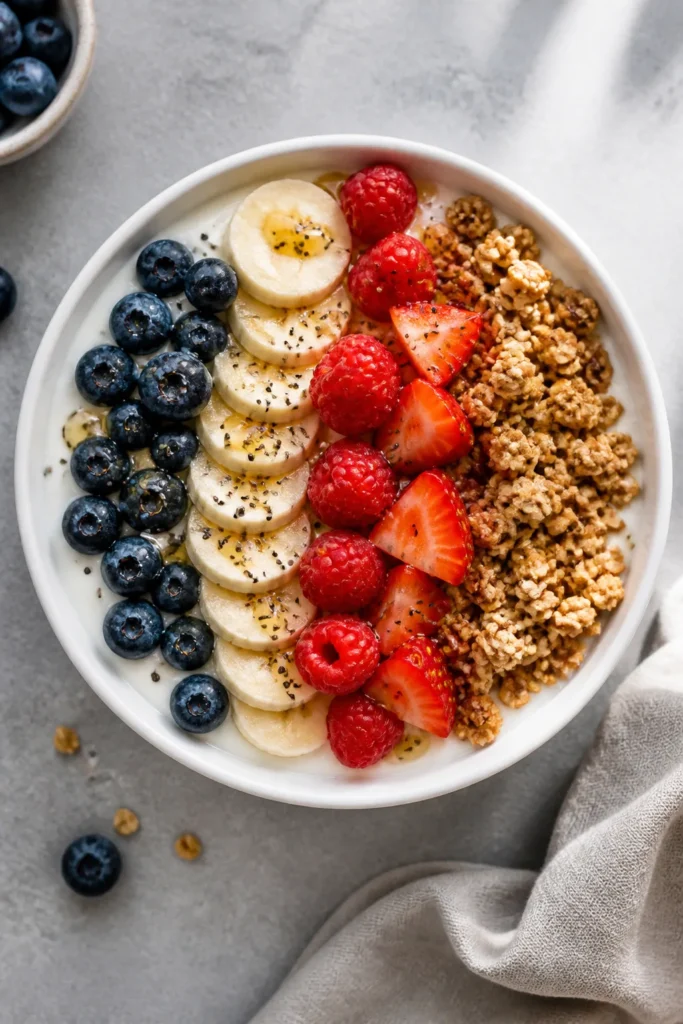
    Overhead of gluten free yogurt bowl with fruit and granola

    Storage, Make-Ahead, and Reheating

    This is best eaten right away for the creamiest texture. If you like a colder, thicker bowl, mix the yogurt with chia seeds the night before and chill. In the morning, add fruit and crunchy toppings so they don’t soften overnight.

    You can batch-prep dry toppers in a small jar: certified gluten free oats or granola, nuts, seeds, and cinnamon. Each night, portion fruit so you can pour and go. No reheating needed, of course, but if your berries are frozen, let them thaw for 5 to 10 minutes or microwave for 15 seconds just to take the chill off.

    If you’re planning a full week of quick mornings, see my simple workflow in gluten free breakfast meal prep. It shows what to prep on Sunday so weekday breakfasts, like this bowl, come together in seconds.

    Common Mistakes to Avoid

    • Using unlabeled oats or granola: Oats can be cross-contaminated. Stick with clearly labeled certified gluten free or swap in nuts and seeds.
    • Adding all the crunchy stuff at night: Granola and nuts soften in the fridge. Add them right before eating for the best crunch.
    • Going too light on protein: Use Greek yogurt, not regular, and include a spoon of nut butter or seeds to actually stay full.
    • Over-sweetening: Berries and banana already add sweetness. Start with a light drizzle of honey or maple, then taste.
    • Skipping salt and spice: A tiny pinch of sea salt and cinnamon makes the flavors pop. It’s a small move with big payoff.
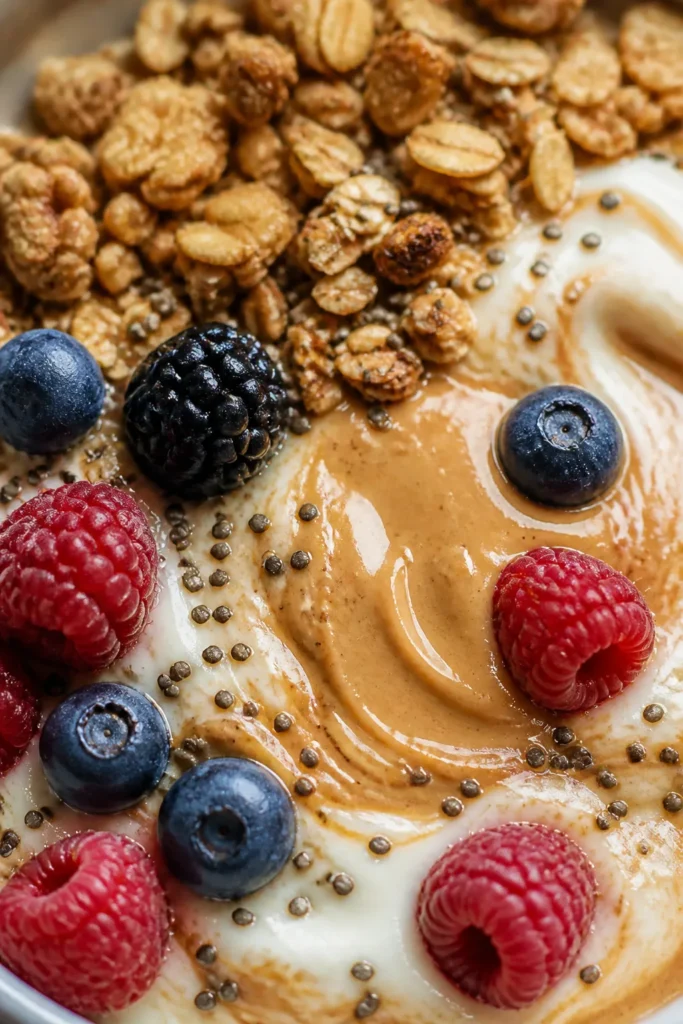
    Close-up of creamy yogurt and crunchy toppings

    Variations and Easy Substitutions

    • Dairy-free: Use a thick dairy-free yogurt made with coconut milk or almond milk. Choose one with at least 6 to 8 grams of protein if possible.
    • No oats: Swap the certified gluten free oats or granola for chopped almonds, walnuts, or pumpkin seeds for extra crunch.
    • Chocolate-berry: Add 1 teaspoon unsweetened cocoa powder and a few dark chocolate chips. Use strawberries or raspberries on top.
    • Tropical: Use pineapple and mango, top with toasted coconut flakes, and drizzle with a little honey.
    • Apple pie bowl: Use diced apple, raisins, cinnamon, and a few crushed pecans. A touch of maple syrup ties it together.
    • Extra protein: Stir in 1 tablespoon collagen peptides or a small scoop of your favorite gluten free protein powder. Adjust sweetness to taste.
    • Seed boost: Swap chia for hemp hearts if you want a softer texture and extra omega-3s.

    What to Serve With It

    On busy weekdays, I pair this bowl with black coffee or hot tea and call it breakfast. If I’m heading into a longer morning, I add a hard-boiled egg on the side or a slice of this gluten free breakfast bread that actually rises.

    For more quick ideas that play nicely with this bowl, check out these gluten free breakfasts under 10 minutes. If you need extra protein at breakfast, this roundup of high-protein gluten free breakfast ideas is a great place to browse.

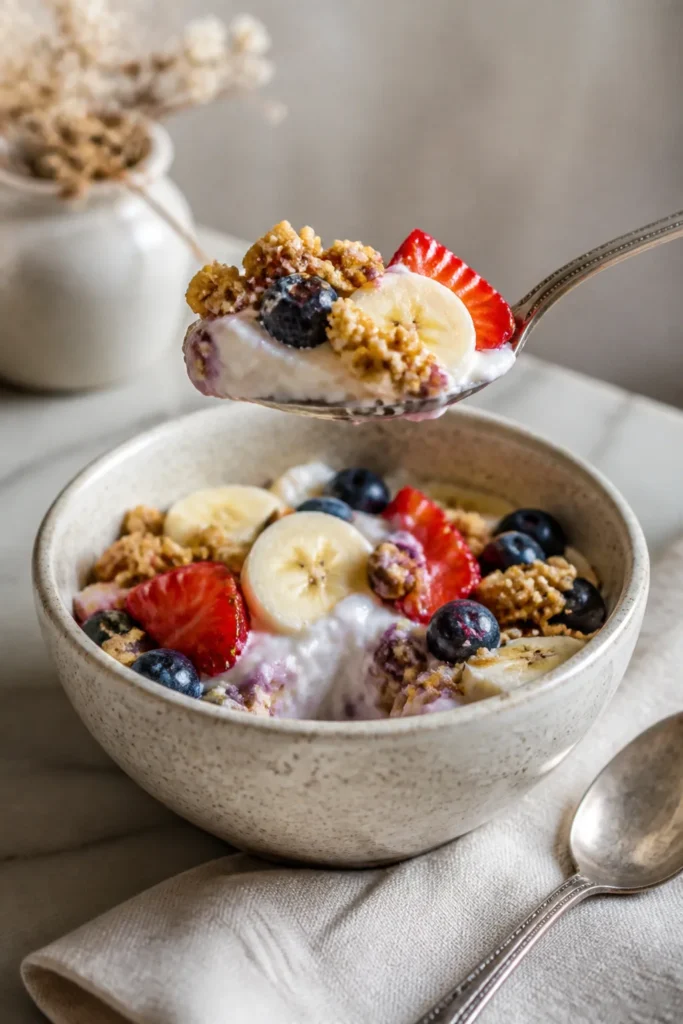
    Single serving spoonful of yogurt bowl with fruit and granola

    Reader Questions

    How do I make sure this bowl is truly gluten free?

    Use Greek yogurt with a clean ingredient list, and make sure any oats or granola are labeled certified gluten free. Keep separate scoops for granola if you share a kitchen with gluten eaters, and avoid bulk bins where cross-contact is common.

    Can I prep these for the whole week?

    Yes. Portion dry toppings (oats or granola, nuts, chia, cinnamon) into small jars and keep chopped fruit in containers. In the morning, add yogurt, pour on the jar of toppings, and finish with nut butter and a drizzle of honey or maple.

    What can I use instead of yogurt?

    Try a thick dairy-free yogurt made from coconut or almond milk. If you want more protein, stir in a tablespoon of collagen peptides or use a soy-based yogurt with higher protein. You can also blend cottage cheese until smooth for a creamy base if you tolerate dairy.

    Can I add vegetables to this without tasting them?

    Yes. Finely grate zucchini or carrot and stir 2 tablespoons into the yogurt with cinnamon and a little extra honey. You can also add a handful of baby spinach to a small side smoothie if you prefer to keep greens separate.

    Is there a nut-free option?

    Swap nut butter for sunflower seed butter or tahini, and use pumpkin or sunflower seeds for crunch. Make sure your seeds and any granola are certified gluten free and processed in a nut-free facility if needed.

    A Short, Warm Wrap-Up

    I love fancy brunch as much as anyone, but most mornings call for speed. This gluten free yogurt bowl is the kind of everyday food that makes life easier and still tastes like a treat.

    Keep the base, change the toppings, and you’ll never get bored. If you make it, tell me your favorite combo. I’m always looking for a new five-minute twist.

  • 6 Gluten Free Breakfast Mistakes That Make You Hungry by 10am

    6 Gluten Free Breakfast Mistakes That Make You Hungry by 10am

    If your gluten free breakfast leaves you hunting for a snack by 10am, you’re not alone. The problem usually isn’t your appetite. It’s small mistakes that make a big difference in how long you stay full.

    Below I’ll show you the six common slip-ups and a balanced, make-ahead breakfast bowl that fixes them. It’s quick, hearty, and friendly for busy mornings.

    Why This Gluten Free Breakfast Keeps You Full

    This post tackles two things at once: the six gluten free breakfast mistakes that cause a mid-morning crash and a simple recipe that checks every box for fullness. You’ll get protein, fiber, and fats in smart portions so your blood sugar rises gently and stays steady.

    When you remove gluten, it’s easy to lean on refined starches and sweeteners without noticing. This bowl uses protein-rich eggs and beans, fiber-filled quinoa and sweet potato, and creamy avocado for staying power. Protein + fiber + fat is the combo that holds you until lunch.

    Want more ideas for long-lasting breakfasts? See these high-protein gluten free breakfast ideas that keep you full, or prep ahead with my 5-day gluten free breakfast meal prep. If you head out early, bookmark gluten free breakfast on the go ideas for 6am departures. And if oats are your go-to, make sure you’ve read what celiacs need to know about oats first.

    Six Gluten Free Breakfast Mistakes That Make You Hungry by 10am

    • Starting with only carbs. A bowl of fruit or plain toast burns fast. Add 15 to 25 g of protein at breakfast to slow the burn.
    • Skipping fiber. Refined gluten free breads and cereals digest quickly. Choose whole-food fiber like quinoa, beans, chia, and vegetables.
    • Forgetting healthy fats. Fat helps you feel satisfied. Add avocado, nuts, seeds, olive oil, or cheese in measured amounts.
    • Drinking breakfast. Smoothies can be great, but many are low in protein and high in sugar. If you smoothie, include protein powder or Greek-style yogurt and a spoon of nut butter.
    • Not enough volume. A small bar isn’t a meal. Build a plate with bulk from vegetables and hearty grains so your stomach actually feels full.
    • Under-salting and under-seasoning. If a GF breakfast tastes bland, you’ll snack sooner. Season well so the meal is truly satisfying.

    Storage, Make-Ahead, and Reheating

    Cook the quinoa and roast the sweet potatoes up to 4 days ahead and keep them chilled in airtight containers. Hard-cook eggs if you prefer grab-and-go, or scramble them fresh in the morning. Beans keep well for 4 days too; rinse and drain before storing.

    For reheating, warm the quinoa, beans, and potatoes together in the microwave for 60 to 90 seconds until hot, then top with fresh spinach to wilt and add the avocado last. If you like everything hot, toss the spinach into the bowl before reheating so it softens nicely.

    Variations and Substitutions

    • No eggs: Swap in 1/2 cup cooked tofu per serving or use extra beans. Season with a pinch of turmeric, cumin, and salt.
    • No quinoa: Use cooked brown rice or certified GF oats prepared as savory oatmeal.
    • Spicy: Add a chopped jalapeño or a dash of hot sauce. Smoked paprika also adds depth.
    • Dairy-free: Skip the cheese and add 1 tbsp toasted pumpkin seeds per serving for crunch and minerals.
    • Meal-prep bowls: Portion everything except avocado into containers. Add avocado, salsa, and lime right before eating.

    What to Serve With It

    A cup of coffee or tea and a glass of water work great. If you want more fiber, add orange slices or berries on the side. For a portable option, keep the salsa and lime in tiny containers and assemble at work.

    Short Conclusion

    Fix these six mistakes and breakfast finally does its job. Keep the easy bowl below in your rotation and you’ll sail past 10am without thinking about snacks.

    Ingredients You’ll Use

    These are simple pantry and fridge staples that make a filling, naturally gluten free breakfast bowl. Use certified gluten free labels where needed, especially on grains, beans, and spices.

    • 1 cup quinoa, rinsed
    • 2 cups water
    • 1 lb sweet potatoes, peeled and cut into 1/2-inch cubes
    • 2 tbsp olive oil, divided
    • 1 tsp ground cumin
    • 1/2 tsp smoked paprika
    • kosher salt, to taste
    • black pepper, to taste
    • 1 can black beans, 15 oz, rinsed and drained
    • 4 large eggs, or more to taste
    • 4 cups baby spinach
    • 1 avocado, sliced
    • 1 cup cherry tomatoes, halved
    • 1/2 cup shredded cheddar or crumbled feta, optional
    • 1 lime, cut into wedges
    • 1/2 cup salsa
    Overhead view of colorful gluten free breakfast bowls.

    How to Make It

    Roast, cook, and assemble into warm bowls with fresh toppings for a satisfying breakfast that lasts.

    1. Preheat the oven to 425°F (220°C). Line a sheet pan with parchment for easy cleanup.
    2. Toss the sweet potato cubes with 1 tbsp olive oil, cumin, smoked paprika, a generous pinch of salt, and pepper. Spread in a single layer and roast for 18 to 22 minutes, stirring once, until tender and lightly browned.
    3. Meanwhile, combine the rinsed quinoa and water in a saucepan. Bring to a boil, reduce to a low simmer, cover, and cook for 15 minutes. Remove from heat and let stand, covered, for 5 minutes, then fluff with a fork and season with a pinch of salt.
    4. Warm the black beans in a small pot over low heat with a splash of water and a pinch of salt and pepper, 3 to 5 minutes, just until hot.
    5. Heat the remaining 1 tbsp olive oil in a nonstick skillet over medium heat. Crack in the eggs and cook to your liking, 3 to 4 minutes for sunny-side or 2 to 3 minutes per side for over-easy. Season with salt and pepper.
    6. Wilt the spinach: add it to the hot quinoa or toss it in the warm skillet for 30 to 60 seconds until just softened.
    7. Assemble the bowls: divide quinoa among 4 bowls. Top with roasted sweet potatoes, warm black beans, and wilted spinach.
    8. Finish each bowl with an egg, avocado slices, cherry tomatoes, cheese if using, a spoon of salsa, and a squeeze of lime. Taste and add more salt or pepper if needed.
    9. Serve hot. For meal prep, keep avocado, lime, and salsa separate and add right before eating.
    Single gluten free breakfast bowl ready to eat.

    Reader Questions

    How much protein should a gluten free breakfast have to keep me full?

    Most adults feel satisfied with 15 to 25 grams of protein at breakfast. In this bowl, two eggs plus beans and quinoa put you in that range. If you stay hungry, add 1 to 2 tablespoons of nuts or seeds or an extra egg.

    Can I make this without eggs and still stay full until lunch?

    Yes. Use 1/2 cup cooked tofu or 3/4 cup beans per serving and keep the avocado for fats. Season generously, and you’ll still get the protein, fiber, and fat combo that prevents a crash.

    What are quick grab-and-go swaps for busy mornings?

    Prep the base (quinoa, beans, and roasted sweet potato) in containers. In the morning, reheat, stir in a handful of spinach to wilt, and top with pre-sliced avocado and salsa. If you truly need to fly, pack the toppings and assemble at your desk.

    Are oats okay for celiacs at breakfast?

    Choose certified gluten free oats and introduce them slowly to see how you feel, since some celiacs are sensitive to avenin. Keep your bowl balanced with protein and fat. If oats don’t work for you, use quinoa or brown rice instead.

    How do I avoid cross-contamination in a shared kitchen at breakfast?

    Use a separate toaster, cutting board, and knife for gluten free food. Store your bread and grains in clearly labeled containers. Wipe counters before prep and keep condiments like butter and jam in squeeze bottles or dedicated GF jars.

  • Gluten Free Breakfast for Celiac Beginners: 12 Things to Check Before You Eat

    Gluten Free Breakfast for Celiac Beginners: 12 Things to Check Before You Eat

    Your first gluten free mornings can feel confusing. Labels, toasters, oats and bacon all seem suspicious. I’ve been there, and breakfast doesn’t have to be stressful.

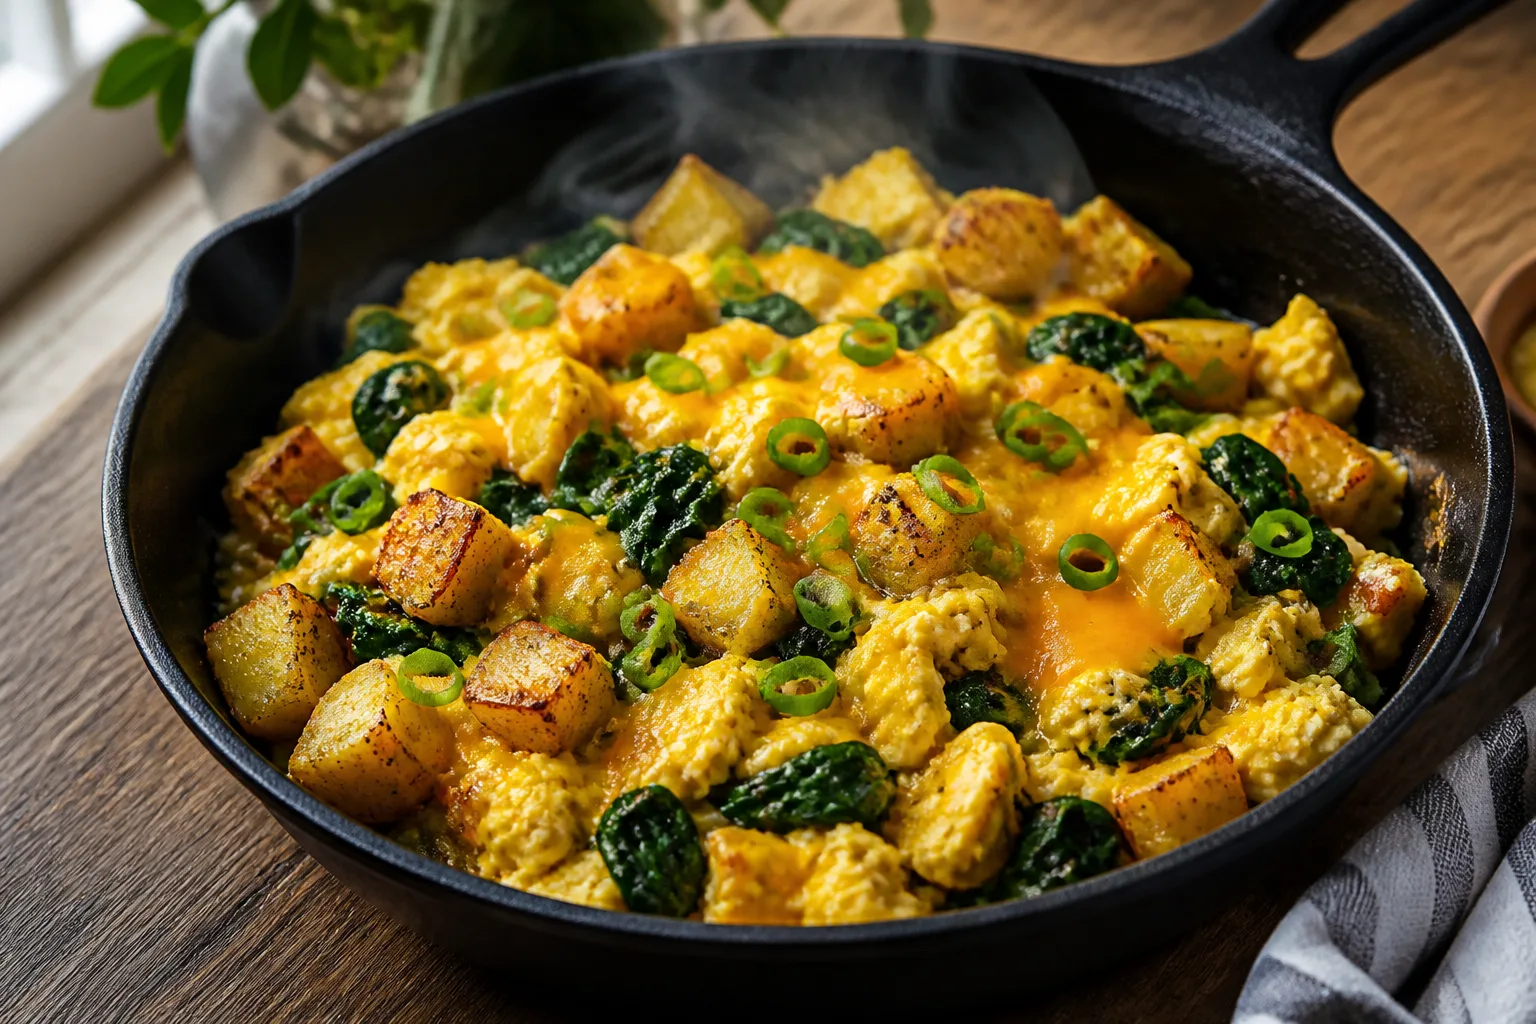
    Below you’ll find a friendly 12-point breakfast checklist for new celiacs and an easy, cozy egg-and-potato skillet you can make without fuss. Keep this page handy and you’ll eat with confidence.

    Why this skillet works for new celiacs + the 12 breakfast checks

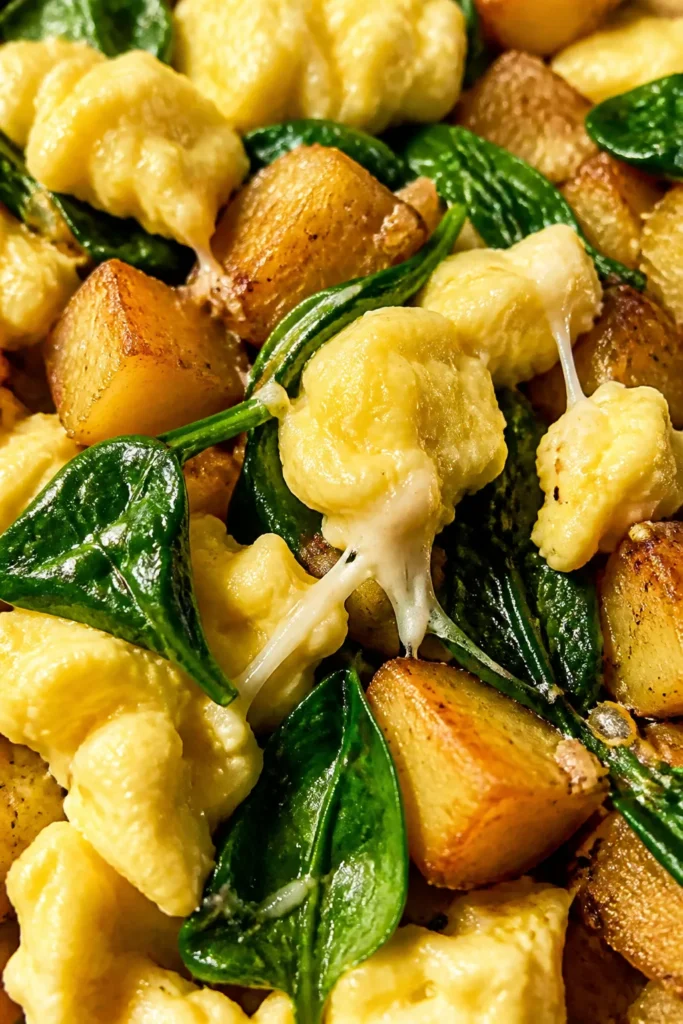
    This simple egg-and-potato skillet sticks to whole foods you recognize: potatoes, eggs, veggies and cheese. It avoids high-risk items like unverified bread, bulk-bin oats and shared fryers. You’ll cook it in one pan, and it reheats well for busy mornings.

    Before any gluten free breakfast, run through this quick checklist. It becomes second nature fast, and it prevents the tiny slip-ups that trigger symptoms.

    1. Certified gluten free label: When buying oats, granola, cereal and breakfast bars, look for a clear gluten free certification or a manufacturer gluten free claim.
    2. Hidden grains: Scan for wheat, barley, rye, malt, brewer’s yeast and wheat starch. These often hide in cereals, sausages and energy bars.
    3. Oats specifics: Choose oats labeled gluten free. Regular oats are frequently cross-contacted during farming and processing. Read more in Gluten Free Breakfast Oats: What Celiacs Need to Know First.
    4. Shared toasters and waffle irons: Crumbs linger. Use a dedicated gluten free toaster or toast in a clean skillet or oven.
    5. Shared fryers: Hash browns or breakfast potatoes are not safe if fried in oil used for breaded foods. Ask before ordering.
    6. Cured meats and sausages: Some contain wheat-based fillers or flavorings. Check the ingredient list and brand statements.
    7. Granola and mix-ins: Many contain barley malt or unverified oats. Pick certified granola or make your own.
    8. Spices and seasoning blends: Single-ingredient spices are usually safe, but blends can include wheat as an anti-caking agent. Verify the brand.
    9. Sauces and syrups: Malt flavoring shows up in some syrups and chocolate sauces. Soy sauce is not gluten free unless labeled.
    10. Buffets and office kitchens: Utensils travel between dishes. Take first from a fresh platter, use clean utensils or bring your own breakfast.
    11. Cutting boards and crumbs: Use a clean board, knife and a dedicated gluten free sponge. Wipe counters first.
    12. Bulk bins and bakery cases: Scoops and air circulate flour. Skip bulk-bin oats, nuts and granola unless they’re sealed and labeled gluten free.

    If you need fast, pre-workout options, see the ideas in gluten free breakfasts for athletes before training. For mornings that start at 6am, these grab-and-go gluten free breakfasts are reader favorites. If cross-contact is your biggest worry, this guide to common gluten free breakfast cross-contamination mistakes will help.

    Ingredients for a Safe, Satisfying Breakfast Skillet

    Keep it simple with fresh produce, eggs and cheese you trust. Check labels on cheese, sausage and hot sauce, and use dedicated gluten free tools.

    • 2 tbsp olive oil
    • 1 lb Yukon Gold potatoes, scrubbed and cut into 1/2-inch cubes
    • 1 red bell pepper, diced
    • 1/2 cup yellow onion, finely chopped
    • 8 large eggs, whisked with a pinch of salt
    • 2 tbsp milk, optional, for softer eggs
    • 3 cups fresh baby spinach, roughly chopped
    • 3 oz sharp cheddar cheese, shredded; verify gluten free
    • kosher salt, to taste
    • black pepper, to taste
    • 2 scallions, thinly sliced, for topping
    • gluten free hot sauce, to taste, optional

    How to make the skillet

    Follow these clear steps and lean on visual cues so you’re never guessing.

    1. Heat 2 tbsp olive oil in a large nonstick or well-seasoned skillet over medium heat for 1 minute until shimmering.
    2. Add the diced potatoes and a big pinch of salt. Cook, stirring every 2 to 3 minutes, until golden on most sides and tender in the center, 12 to 15 minutes. Adjust heat if browning too fast.
    3. Stir in the onion and red bell pepper. Cook until the onion is translucent and the pepper softens, 3 to 4 minutes.
    4. Reduce heat to medium-low. Push the vegetables to one side of the pan to create space for the eggs.
    5. Whisk the eggs with 2 tbsp milk if using, a pinch of salt and black pepper. Pour the eggs into the empty side of the skillet.
    6. Let the eggs sit for 10 to 15 seconds, then gently push and fold with a spatula until soft curds form and the eggs are just set, 2 to 3 minutes. Avoid overcooking; remove from direct heat if needed.
    7. Fold the eggs into the potatoes and peppers. Add the spinach and cook, stirring, until just wilted, 30 to 60 seconds.
    8. Sprinkle the shredded cheddar over the skillet. Turn off the heat, cover and let the cheese melt from residual heat, 1 minute.
    9. Taste and season with additional salt and pepper. Top with sliced scallions and a few shakes of gluten free hot sauce if you like.
    10. Serve hot. For a crisp edge on leftovers, reheat in a lightly oiled skillet over medium heat for 3 to 5 minutes, stirring once.
    Overhead of egg and potato breakfast skillet

    Storage, make-ahead and reheating

    The skillet holds up well for a few days, which is perfect when you’re still learning labels and need low-stress breakfasts ready to go. Cool leftovers, then store in an airtight container for up to 4 days. Reheat in a covered skillet over medium-low heat for 3 to 5 minutes until hot, or microwave in 30-second bursts, stirring once.

    To meal prep, cook the potatoes and peppers the night before and keep the whisked eggs in a sealed jar. In the morning, combine and cook for a fresh finish. If you love prepping several options at once, try this 5-day gluten free breakfast meal prep for more ways to stock the fridge.

    Common mistakes to avoid

    • Using a shared toaster: Crumbs make it unsafe. Toast in a clean skillet or a separate gluten free toaster.
    • Buying unlabeled oats: Regular oats can be cross-contacted. Choose oats labeled gluten free if you want them at breakfast.
    • Trusting restaurant fryers: Ask if the fryer is dedicated. If not, skip fried potatoes and order skillet-cooked sides.
    • Skipping the spice label: Seasoning blends may have wheat. Pick certified brands or use single-ingredient spices.
    • Reheating on a dirty pan: Wash pans and spatulas or use dedicated gluten free cookware to avoid crumbs from last night’s grilled cheese.
    Close-up of fluffy eggs and crispy potatoes

    Variations and substitutions

    • Swap the potatoes: Use 3 cups of diced sweet potato or frozen hash browns labeled gluten free.
    • Add protein: Stir in 6 oz cooked gluten free breakfast sausage or bacon pieces after the potatoes brown.
    • Dairy-free: Skip the cheese and add 1 extra tablespoon olive oil. Finish with avocado slices.
    • Veggie boost: Add mushrooms or zucchini with the peppers, or fold in cherry tomatoes at the end.
    • Spice route: Try smoked paprika, chili powder or Italian seasoning. Always confirm your spice blends.

    What to serve with it

    Serve the skillet with a small bowl of fruit, a side of avocado, or a slice of your favorite certified gluten free toast from a dedicated toaster. For a quick sip, blend a simple smoothie like the ones in gluten free breakfast smoothies. If you prefer a sweet morning, add a spoon of salsa and a few berries to balance the plate.

    Single serving of gluten free breakfast skillet with avocado

    Celiac breakfast questions you’re asking

    Are eggs and potatoes always gluten free?

    Yes, plain eggs and plain potatoes are naturally gluten free. The risk comes from seasonings, coatings and shared equipment. Use your own clean pan, verify spice blends and be careful with frozen potato products that may include wheat-based coatings.

    What’s the safest cereal or granola for a new celiac?

    Pick a brand that is either certified gluten free or clearly labeled gluten free by the manufacturer. Double-check for barley malt, malt extract and unverified oats. When in doubt, choose a simple option like certified gluten free oats or a nut-and-seed mix you make yourself.

    How can I eat out at breakfast without getting glutened?

    Call ahead and ask about dedicated fryers, toasters and prep areas. Order items cooked on a clean skillet, like eggs, bacon and sautéed potatoes. Skip toast unless the restaurant has certified gluten free bread and a dedicated toasting method, and confirm sausage ingredients.

    Is coffee safe for celiacs?

    Plain coffee and espresso are gluten free. Flavor syrups and drink powders may contain barley malt or shared-equipment risks. Ask to see the bottle or brand information, and keep your own milk alternatives or syrup packets if you’re unsure.

    Do I need separate cookware at home?

    Dedicated items for high-crumb tasks help a lot: a toaster, wooden spoons, cutting boards and colanders. Stainless steel and cast iron can be cleaned well. If your home is mixed-diet, label gluten free tools and store them in a separate bin.

    You’ve got this

    Breakfast gets easier with every safe plate. Keep the 12 checks nearby, cook this simple skillet a couple of times, and soon your mornings will feel calm and predictable. I’m cheering for you, and my kitchen is always testing something new to make gluten free life feel normal and delicious.